
CodeReady Containers with GPU for Data Science

Lots of Data Scientists want to focus on model building.
Just using a local Jupyter Notebook can be a limitation if you want to:
- create scalable Machine Learning systems
- test local private data ingestion
- contribute to Kubeflow
- tune your model serving pipeline
You can build an All-in-One Kubernetes environment with NVIDIA GPU for Data Science on your local PC or one bare-metal cloud server, let’s see how CodeReady Containers works.
Red Hat CodeReady Containers 1.6.0 based on OpenShift 4.3 was announced in February: https://github.com/code-ready/crc/releases/tag/1.6.0
Red Hat CodeReady Containers (CRC) brings a minimal OpenShift 4 cluster to your local computer. This cluster provides a minimal environment for development and testing purposes. It’s mainly targetted at running on developers’ desktops. For other use cases, such as headless, multi-developer, or team-based setups, the use of the full-fledged OpenShift installer is recommended.
CodeReady Containers does not enable GPU by default for now. I wanted to try with a proof of concept if CodeReady Containers could provide GPUs with the NVIDIA GPU Operator.
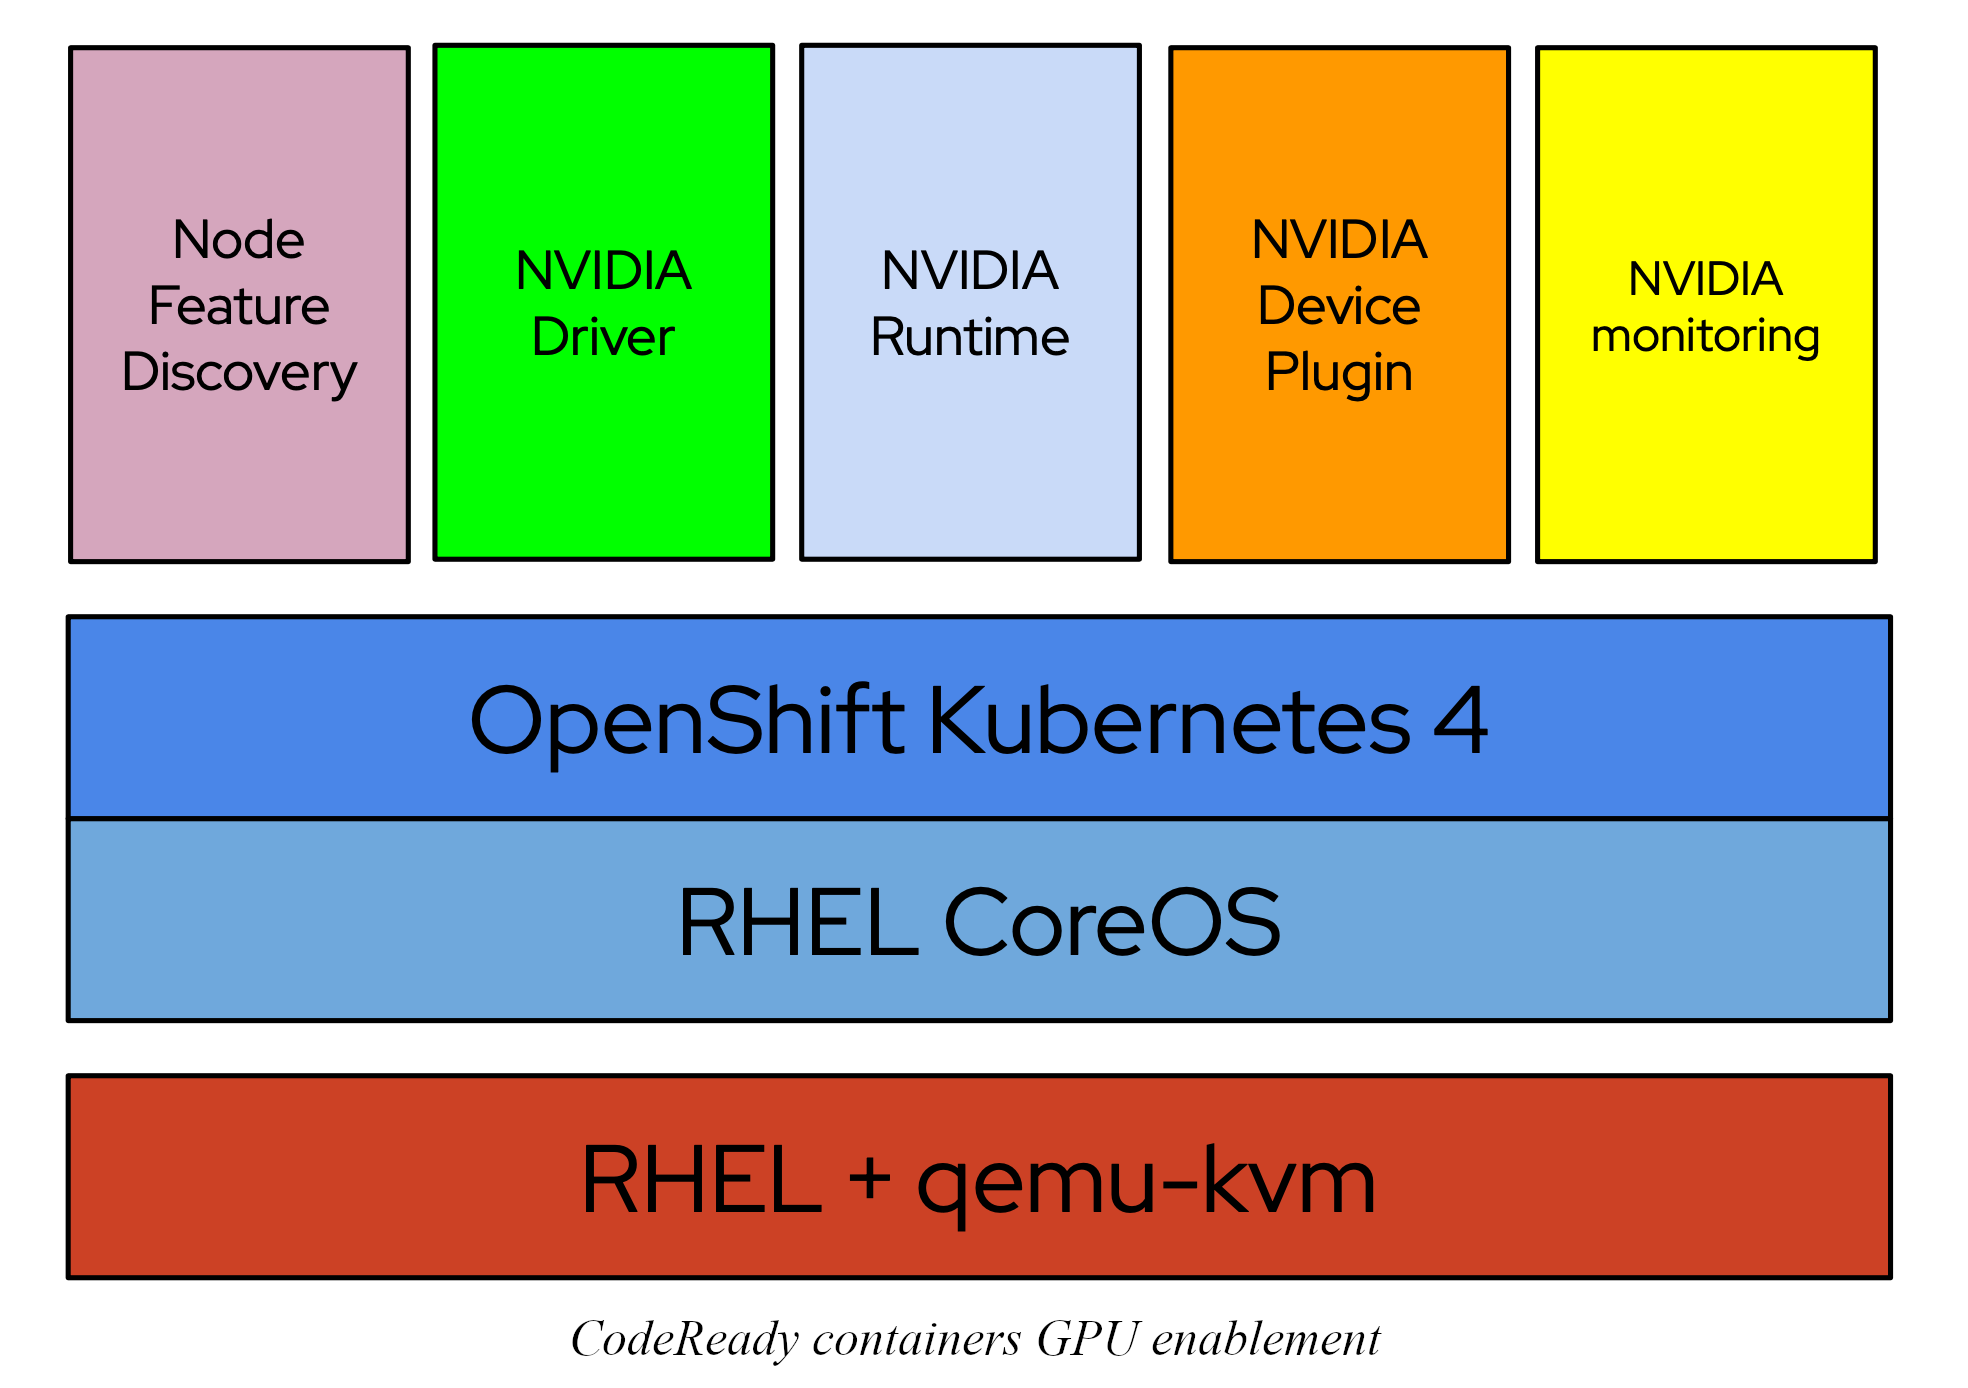
We will modify a standard deployment to check if we can enable GPUs in CodeReady Containers with the NVIDIA GPU Operator.
Summary:
- CodeReady Containers with GPU requirements
- Prepare the USB boot key with RHEL 8.1
- Install RHEL
- Install CodeReady Containers
- Test the console
- Check the environment
- Enable GPU with this CodeReady Containers deployment
- Enable IOMMU and disable Nouveau driver
- Setup the PCI Passthrough
- Universal Base Image entitlement
- Deploy the GPU operator
- Test Jupyter Notebook with TensorFlow
- Test Resnet50 benchmark
- Test GPU training benchmark
CodeReady Containers with GPU requirements
CodeReady Containers requires the following minimum system resources to run Red Hat OpenShift:
- 4 virtual CPUs (vCPUs)
- 8 GB of memory
- 35 GB of storage space
We can take a simple home desktop with this hardware:
- Intel Core i7-7700K Kaby Lake CPU cooled by the be quiet!’s Pure Rock CPU cooler
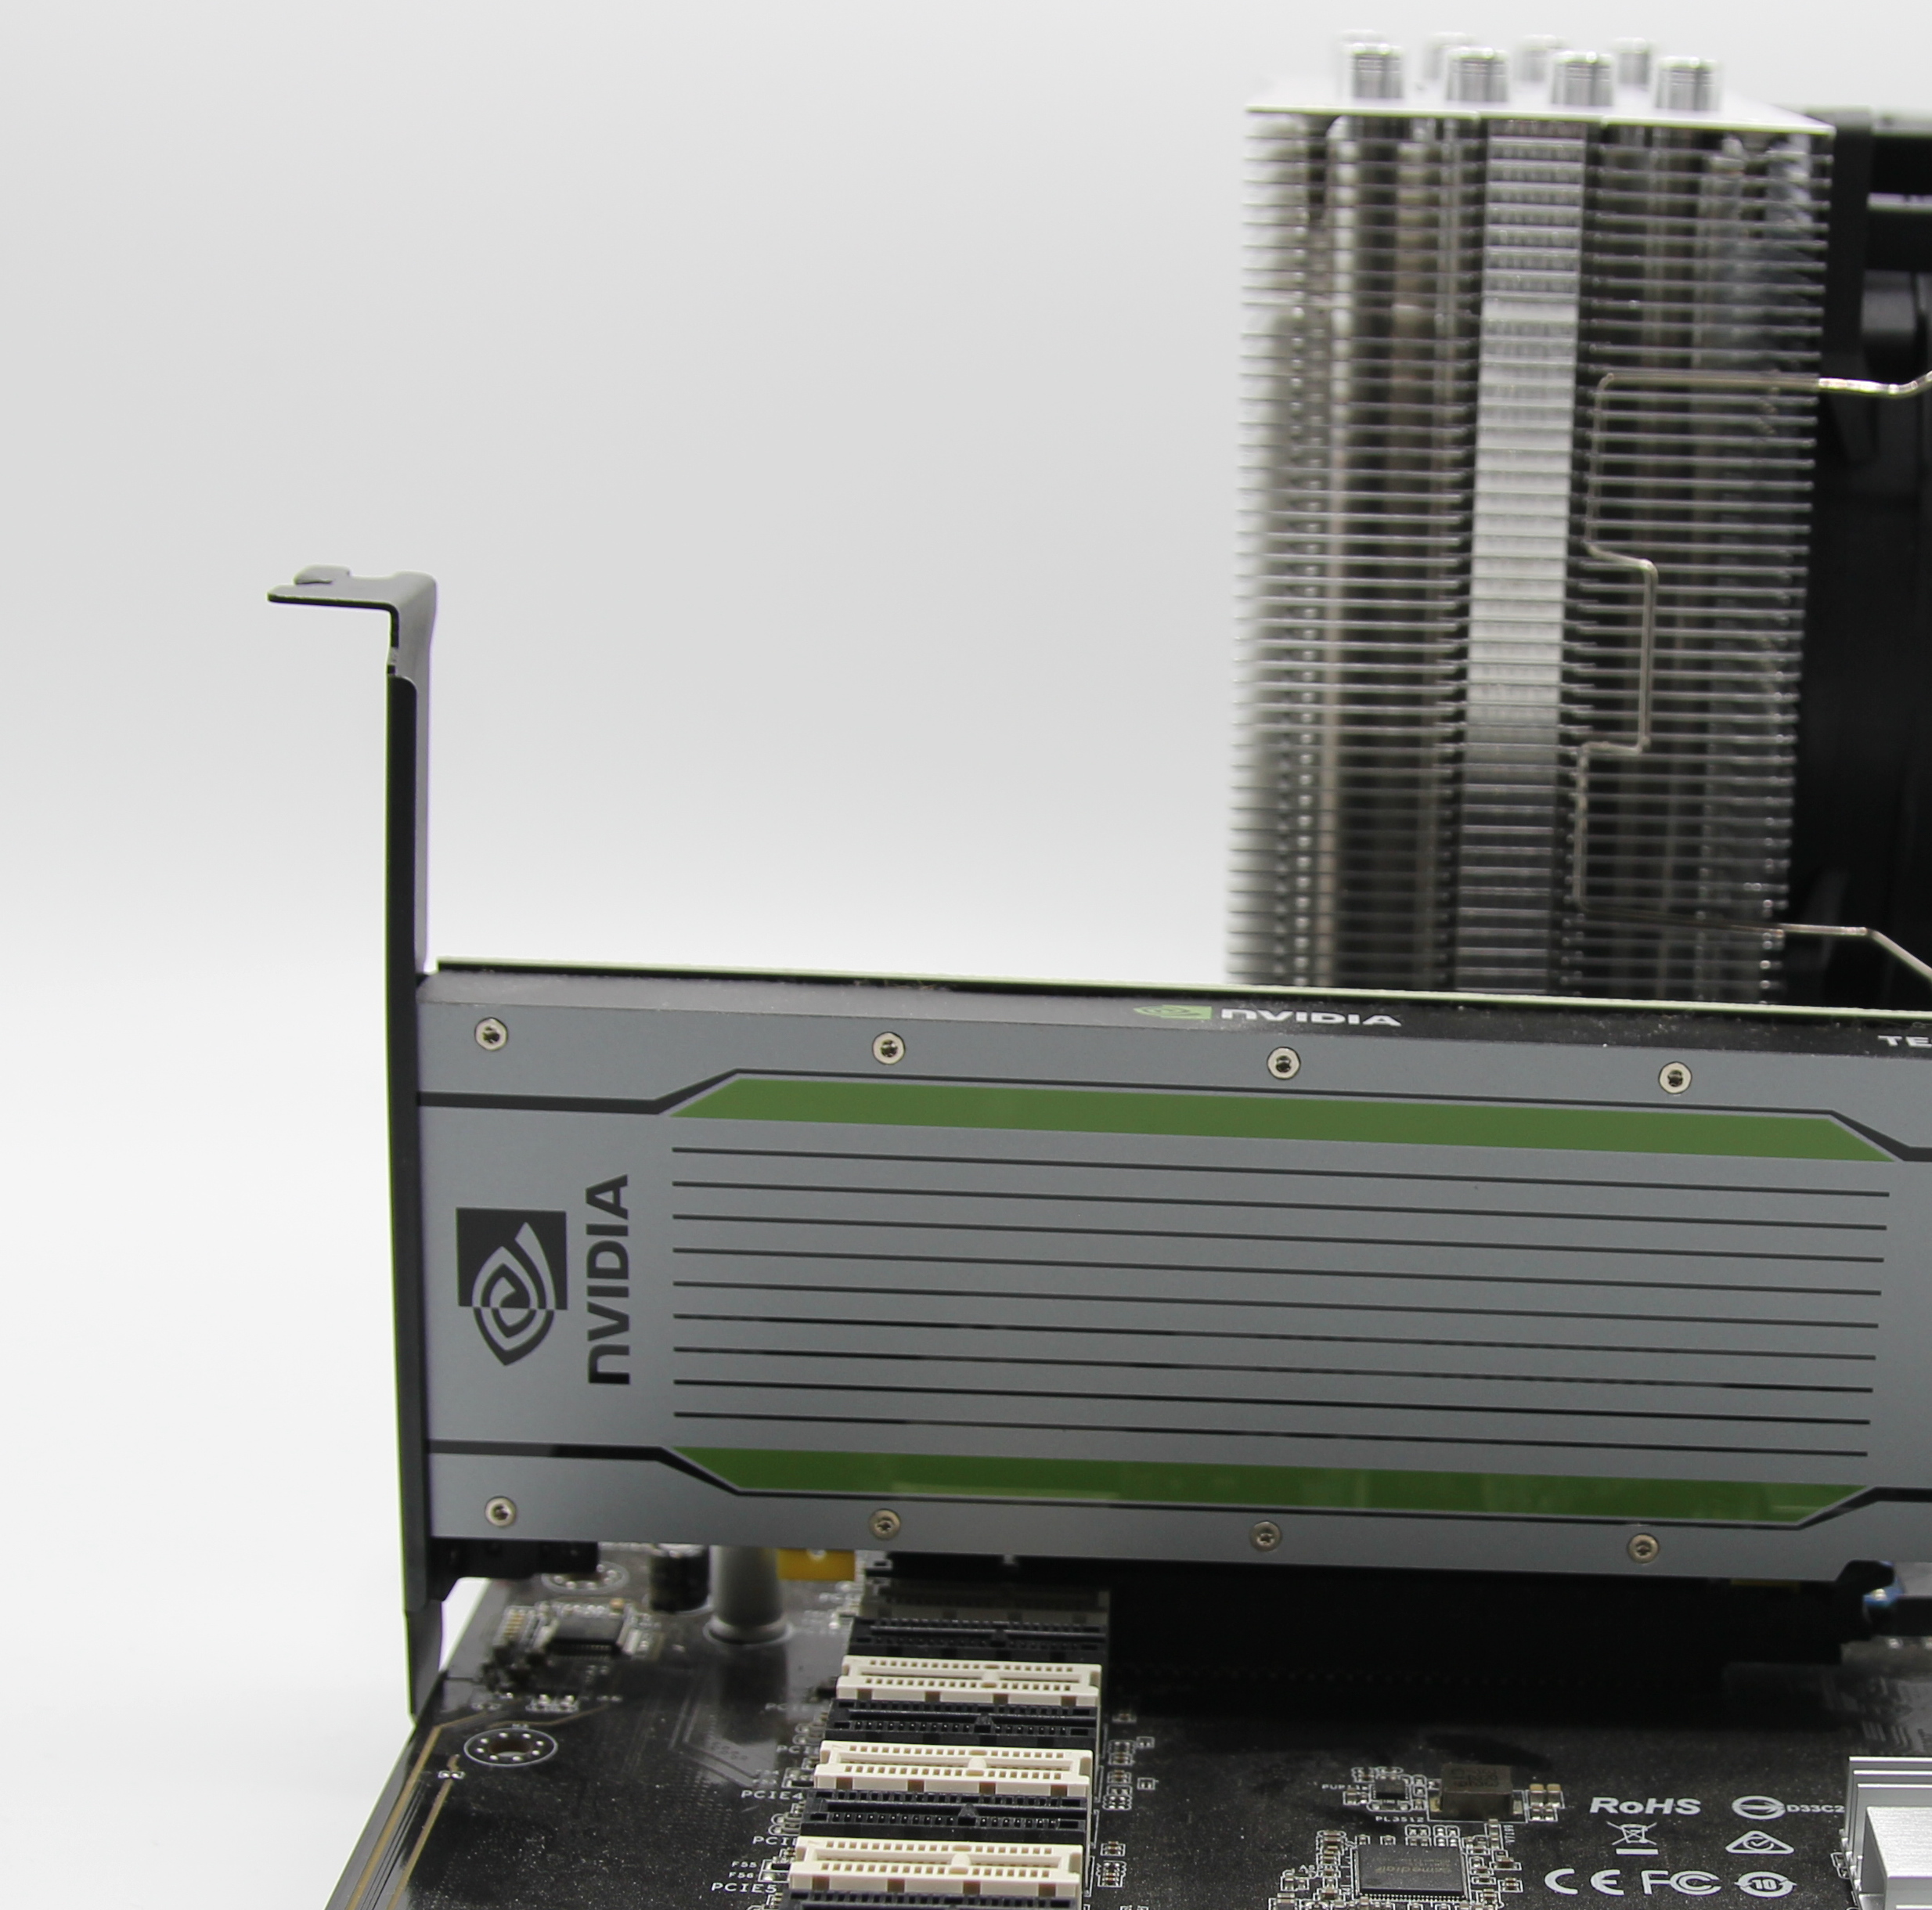
- NVIDIA T4 with custom cooling
- 16 GB RAM
- KINGSTON SM2280S m.2 240GB + NVMe Sabrent m.2 1TB
The NVIDIA Telsa T4 is based on the Turing GPU Architecture, but you can use any GPU based on Pascal, Volta or Turing architectures.
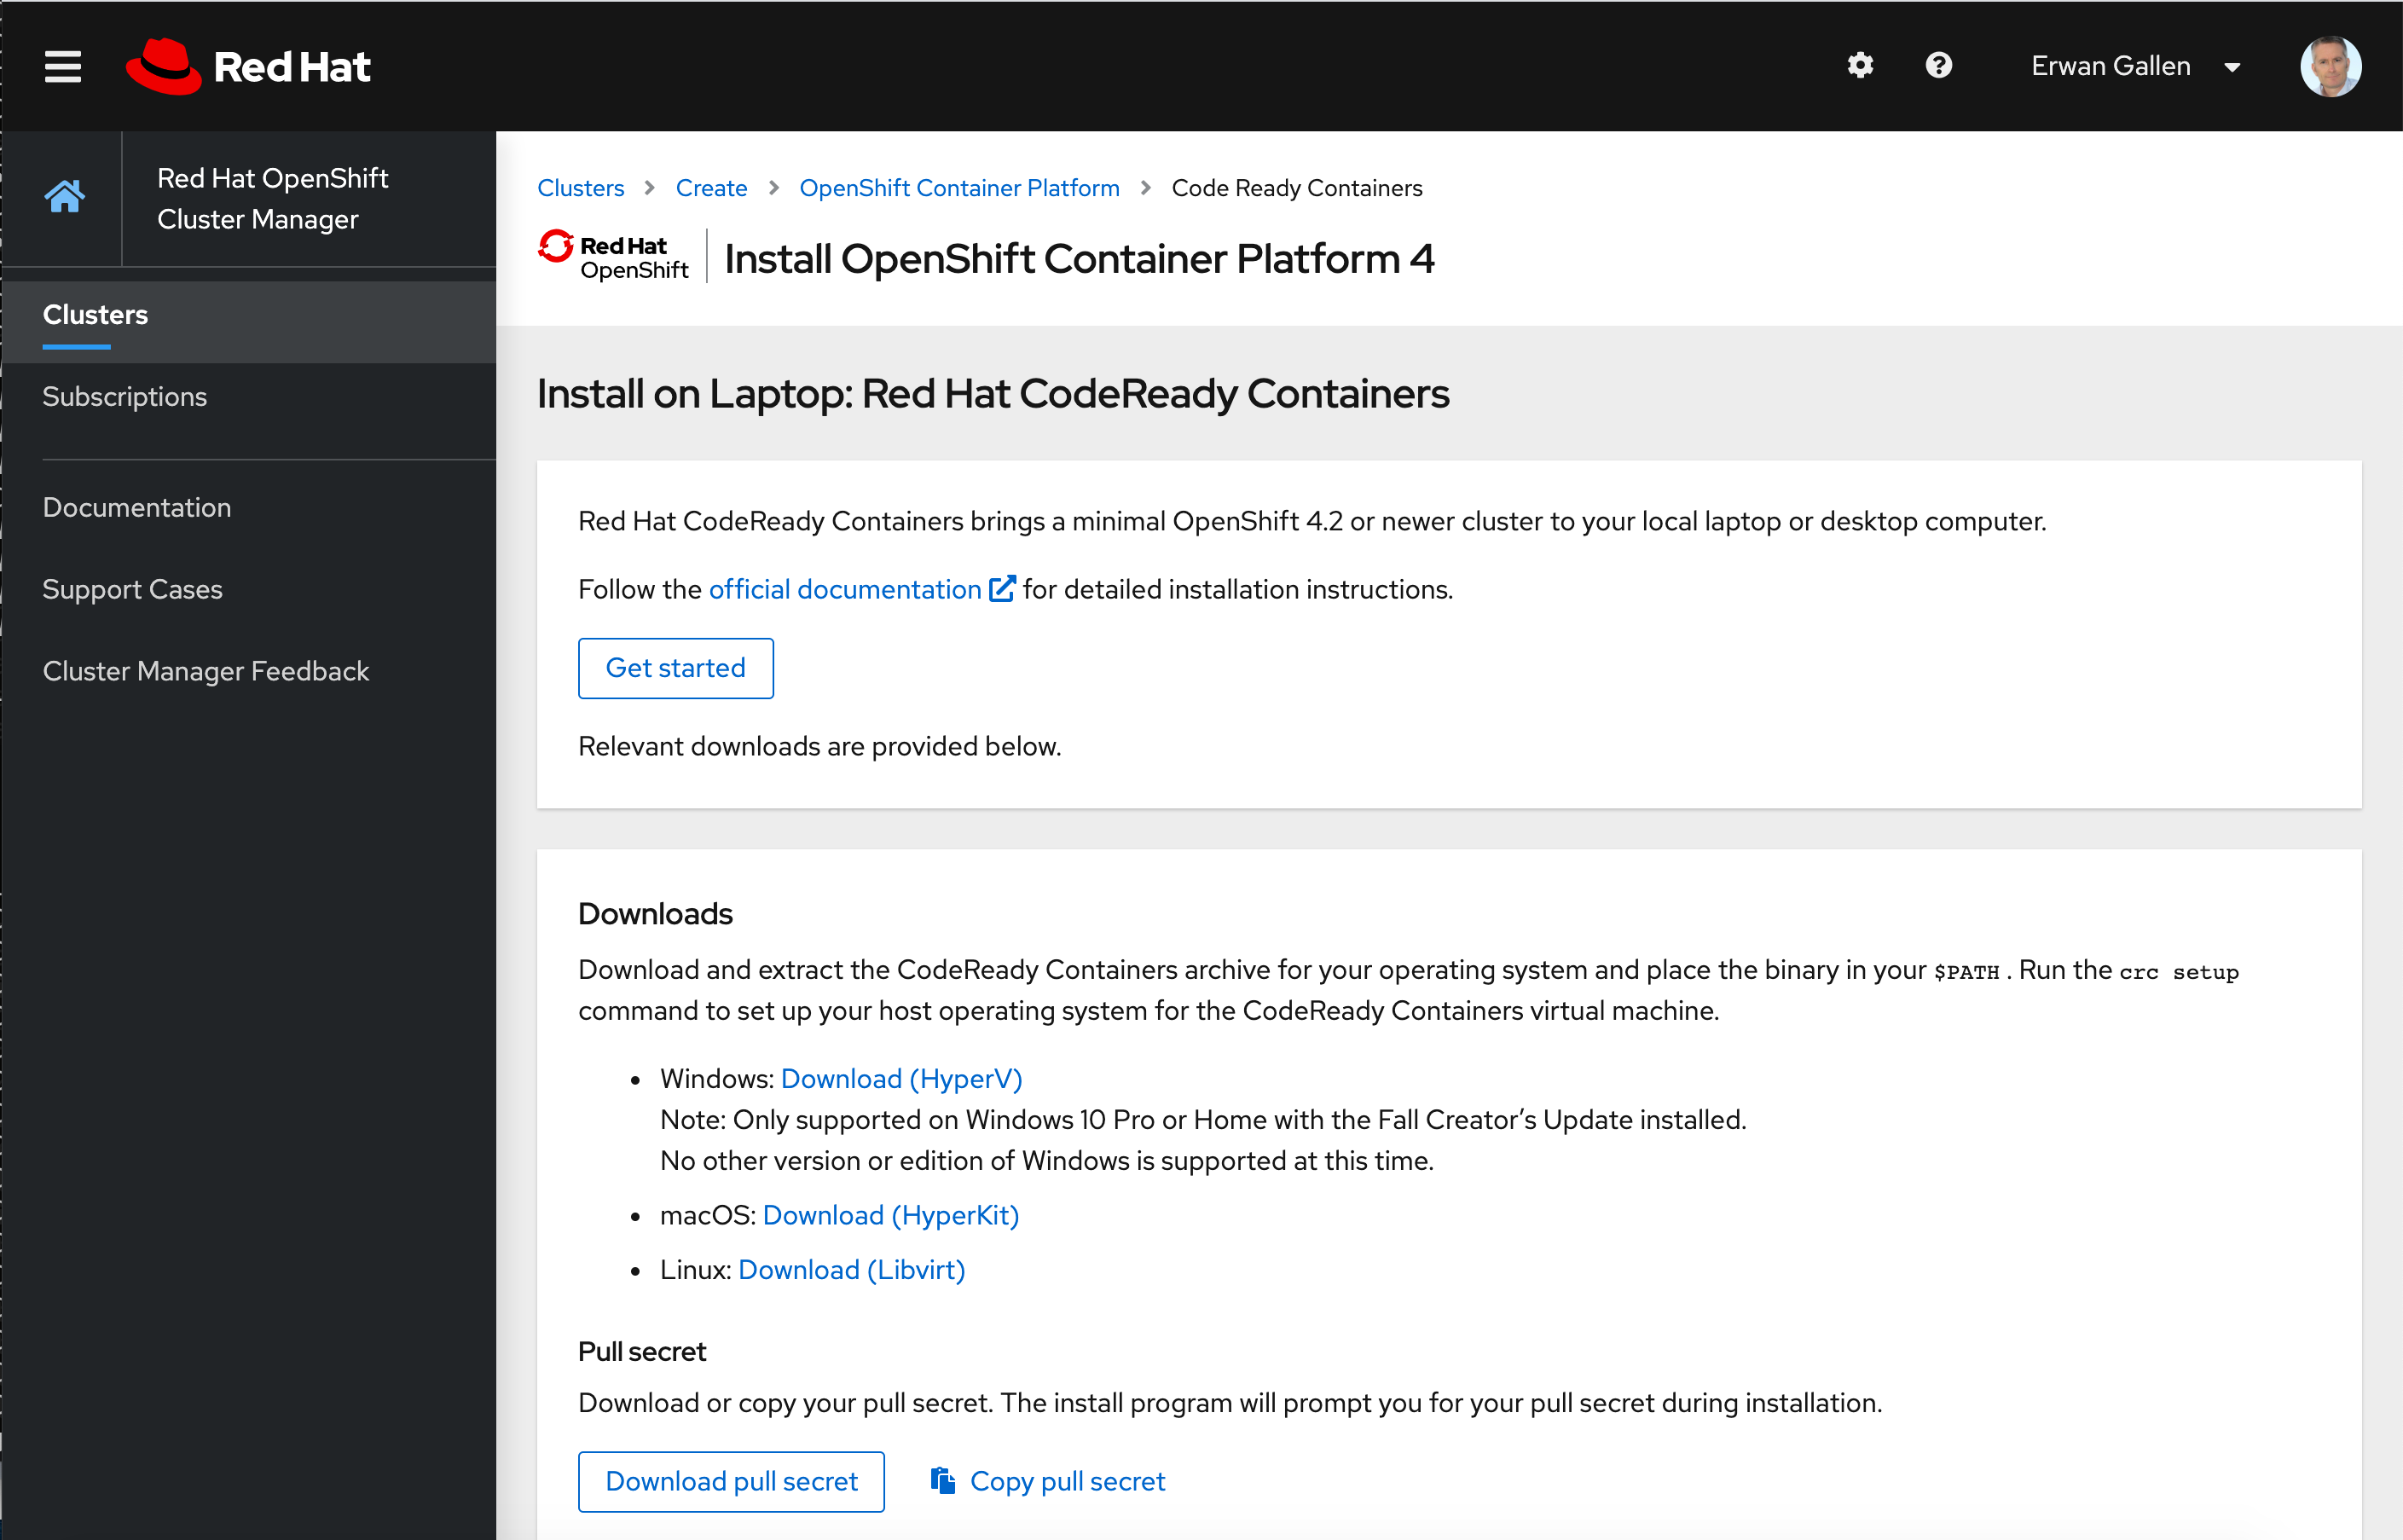
You can download CodeReady Containers from the Red Hat CodeReady Containers product page: https://cloud.redhat.com/openshift/install/crc/installer-provisioned
You can use Red Hat CodeReady Containers on multiple OSs like: RHEL, CentOS, Fedora, Debian or Ubuntu. We will deploy this station with RHEL 8.1.
Prepare the USB boot key with RHEL 8.1
We will prepare the USB boot key on a MacBook.
Copy the download link “Red Hat Enterprise Linux 8.1 Binary DVD” here:
Convert the iso image
egallen@laptop % hdiutil convert -format UDRW -o rhel-8.1-x86_64-dvd_CONVERTED.iso rhel-8.1-x86_64-dvd.iso
Check your disks on a MacBook Pro:
egallen@laptop % diskutil list /dev/disk2
/dev/disk2 (external, physical):
   #:                       TYPE NAME                    SIZE       IDENTIFIER
   0:     FDisk_partition_scheme                        *32.1 GB    disk2
   1:                       0xEF                         10.4 MB    disk2s2
Unmount the USB key:
egallen@laptop % diskutil unmountDisk /dev/disk2
Unmount of all volumes on disk2 was successful
Write the ISO content into the USB key:
egallen@laptop % time sudo dd if=rhel-8.1-x86_64-dvd_CONVERTED.iso.dmg of=/dev/disk2 bs=1m
7487+1 records in
7487+1 records out
7851202560 bytes transferred in 708.076167 secs (11088076 bytes/sec)
sudo dd if=rhel-8.1-x86_64-dvd_CONVERTED.iso.dmg of=/dev/disk2 bs=1m  0.03s user 28.32s system 3% cpu 11:49.00 total
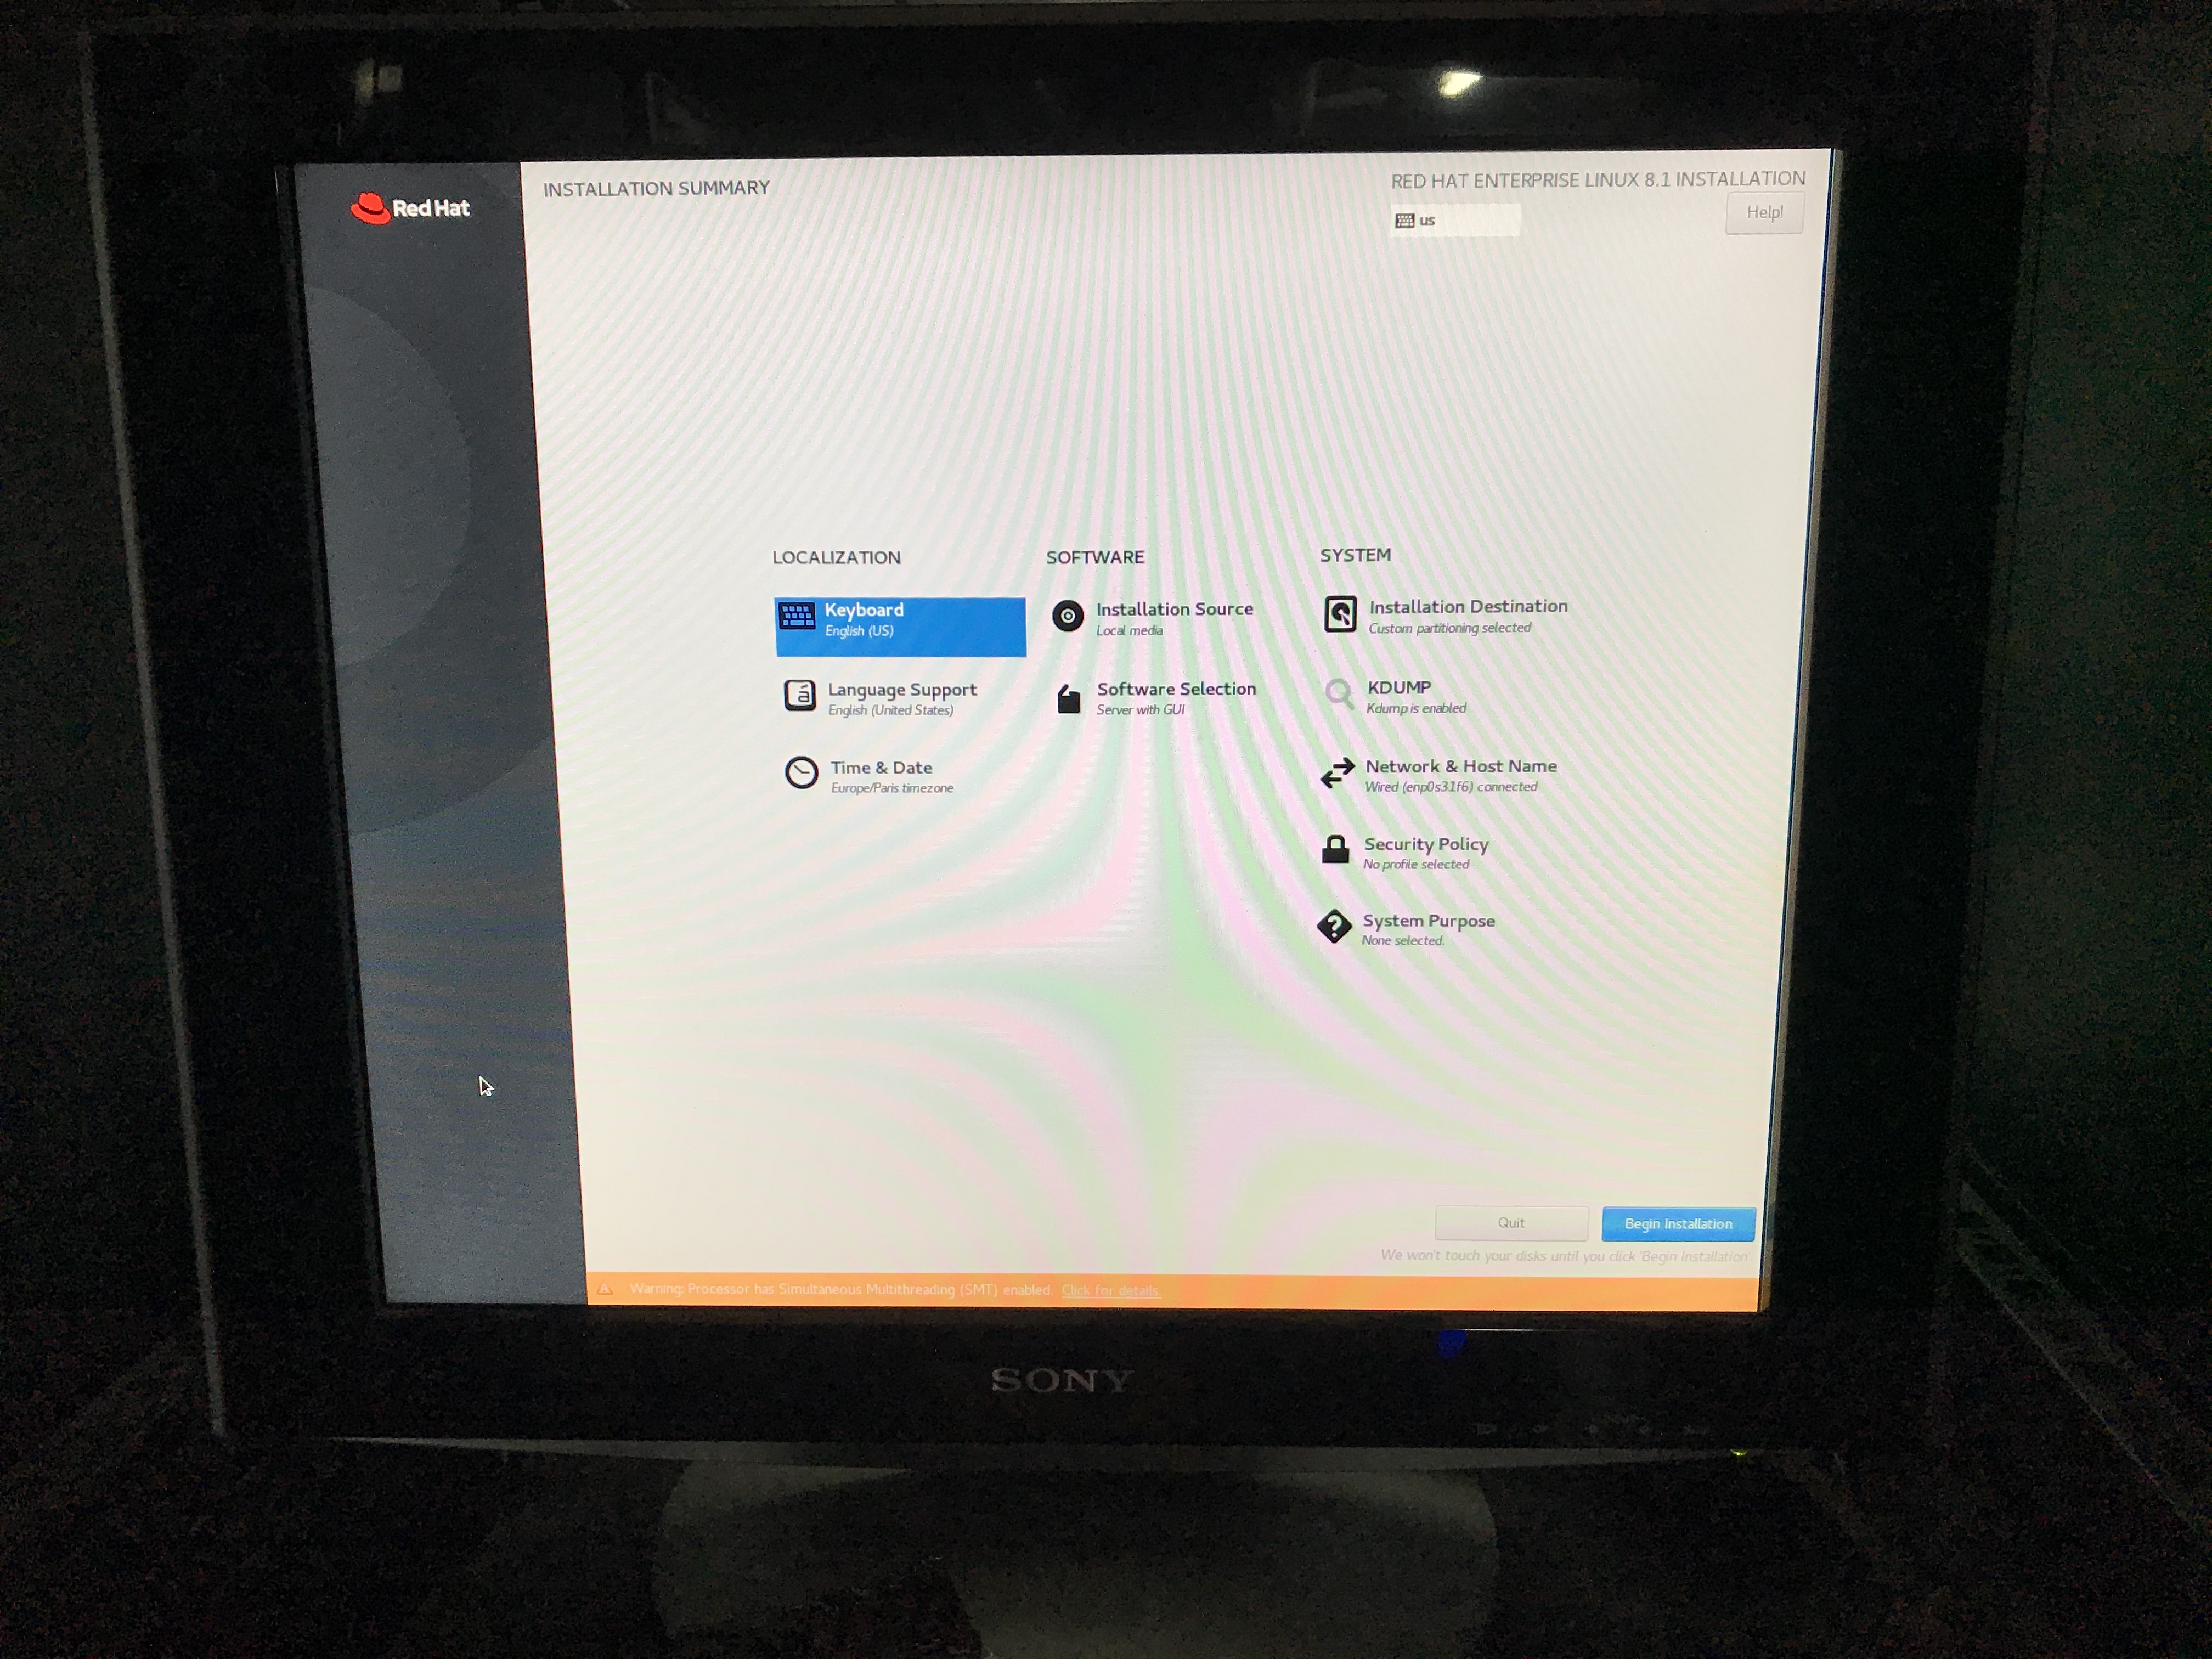
Install RHEL
Plug your USB key into the desktop and boot from this USB key.
Enable sudo NOPASSWD:
[egallen@datastation ~]$ echo "egallen ALL=(root) NOPASSWD:ALL" | sudo tee -a /etc/sudoers.d/egallen
egallen ALL=(root) NOPASSWD:ALL
Check the system release:
[egallen@datastation ~]$ cat /etc/redhat-release
Red Hat Enterprise Linux release 8.1 (Ootpa)

[egallen@datastation ~]$ uname -a
Linux datastation.lan.redhat.com 4.18.0-147.el8.x86_64 #1 SMP Thu Sep 26 15:52:44 UTC 2019 x86_64 x86_64 x86_64 GNU/Linux
Register the node:
[egallen@datastation ~]$ sudo subscription-manager register --username myrhnaccount
Registering to: subscription.rhsm.redhat.com:443/subscription
Password:
The system has been registered with ID: xxxxxxxxx-xxxx-xxxx-xxxx-xxxxxxxxx
The registered system name is: datastation.lan.redhat.com

[egallen@datastation ~]$ sudo subscription-manager attach --pool=xxxxxxxxxxxxxxxxxxxxxxx
This unit has already had the subscription matching pool ID "xxxxxxxxxxxxxxxxxxxxxxx" attached.

[egallen@datastation ~]$ sudo subscription-manager repos --disable=*

[egallen@datastation ~]$ sudo subscription-manager repos --enable=rhel-8-for-x86_64-baseos-rpms --enable=rhel-8-for-x86_64-appstream-rpms
Repository 'rhel-8-for-x86_64-baseos-rpms' is enabled for this system.
Repository 'rhel-8-for-x86_64-appstream-rpms' is enabled for this system.
Update the system:
[egallen@datastation ~]$ sudo yum upgrade -y

[egallen@datastation ~]$ cat /etc/redhat-release
Red Hat Enterprise Linux release 8.1 (Ootpa)

[egallen@datastation ~]$ uname -a
Linux datastation.lan.redhat.com 4.18.0-147.el8.x86_64 #1 SMP Thu Sep 26 15:52:44 UTC 2019 x86_64 x86_64 x86_64 GNU/Linux
We have a Kaby Lake processor:
[egallen@datastation ~]$ cat /proc/cpuinfo | grep -m 1 "model name"
model name  : Intel(R) Core(TM) i7-7700K CPU @ 4.20GHz
We have two GPUs, the default Intel HD Graphics 630 will be used for the system, the NVIDIA Tesla T4 will be dedicated to the CodeReady Container VM:
[egallen@datastation ~]$ sudo lshw -numeric -C display
  *-display
       description: 3D controller
       product: TU104GL [Tesla T4] [10DE:1EB8]
       vendor: NVIDIA Corporation [10DE]
       physical id: 0
       bus info: pci@0000:01:00.0
       version: a1
       width: 64 bits
       clock: 33MHz
       capabilities: pm bus_master cap_list
       configuration: driver=vfio-pci latency=0
       resources: irq:16 memory:f6000000-f6ffffff memory:e0000000-efffffff memory:f0000000-f1ffffff
  *-display
       description: VGA compatible controller
       product: HD Graphics 630 [8086:5912]
       vendor: Intel Corporation [8086]
       physical id: 2
       bus info: pci@0000:00:02.0
       version: 04
       width: 64 bits
       clock: 33MHz
       capabilities: pciexpress msi pm vga_controller bus_master cap_list rom
       configuration: driver=i915 latency=0
       resources: irq:137 memory:f5000000-f5ffffff memory:d0000000-dfffffff ioport:f000(size=64) memory:c0000-dffff
We have one m.2 SATA of 240GB:
[egallen@datastation ~]$ sudo lshw -numeric -C disk
  *-disk
       description: ATA Disk
       product: KINGSTON SM2280S
       physical id: 0.0.0
       bus info: scsi@0:0.0.0
       logical name: /dev/sda
       version: 01.W
       serial: 50026B7277014B6E
       size: 223GiB (240GB)
       capabilities: partitioned partitioned:dos
       configuration: ansiversion=5 logicalsectorsize=512 sectorsize=512 signature=aa4152a6
Install CodeReady Containers
Go here, and copy in your clipboard the download link “Linux: Download (Libvirt)” https://cloud.redhat.com/openshift/install/crc/installer-provisioned.
Download the crc instaled for Linux:
[egallen@datastation ~]$ wget https://mirror.openshift.com/pub/openshift-v4/clients/crc/latest/crc-linux-amd64.tar.xz

[egallen@datastation ~]$ ls -lah crc-linux-amd64.tar.xz
-rw-rw-r--. 1 egallen egallen 1.8G Feb 18 11:08 crc-linux-amd64.tar.xz
Uncompress the archive:
[egallen@datastation ~]$ tar xJf crc-linux-amd64.tar.xz

[egallen@datastation ~]$ ls -la crc-linux-1.6.0-amd64
total 1831360
drwxrwxr-x. 2 egallen egallen         47 Feb 18 10:52 .
drwx------. 6 egallen egallen        199 Mar  5 23:24 ..
-rw-rw-r--. 1 egallen egallen      11325 Feb 18 10:52 LICENSE
-rwxrwxr-x. 1 egallen egallen 1875048474 Feb 18 10:52 crc
-rw-r--r--. 1 egallen egallen     248564 Feb 18 10:52 doc.pdf
Move the binary to the root folder:
[egallen@datastation ~]$ mv crc-linux-1.6.0-amd64/crc .
Prepare the setup:
[egallen@datastation ~]$ ./crc setup
INFO Checking if oc binary is cached
INFO Caching oc binary
INFO Checking if CRC bundle is cached in '$HOME/.crc'
INFO Unpacking bundle from the CRC binary
INFO Checking if running as non-root
INFO Checking if Virtualization is enabled
INFO Checking if KVM is enabled
INFO Checking if libvirt is installed
INFO Installing libvirt service and dependencies
INFO Will use root access: install virtualization related packages
INFO Checking if user is part of libvirt group
INFO Adding user to libvirt group
INFO Will use root access: add user to libvirt group
INFO Checking if libvirt is enabled
INFO Checking if libvirt daemon is running
INFO Checking if a supported libvirt version is installed
INFO Checking if crc-driver-libvirt is installed
INFO Installing crc-driver-libvirt
INFO Checking for obsolete crc-driver-libvirt
INFO Checking if libvirt 'crc' network is available
INFO Setting up libvirt 'crc' network
INFO Checking if libvirt 'crc' network is active
INFO Starting libvirt 'crc' network
INFO Checking if NetworkManager is installed
INFO Checking if NetworkManager service is running
INFO Checking if /etc/NetworkManager/conf.d/crc-nm-dnsmasq.conf exists
INFO Writing Network Manager config for crc
INFO Will use root access: write NetworkManager config in /etc/NetworkManager/conf.d/crc-nm-dnsmasq.conf
INFO Will use root access: execute systemctl daemon-reload command
INFO Will use root access: execute systemctl stop/start command
INFO Checking if /etc/NetworkManager/dnsmasq.d/crc.conf exists
INFO Writing dnsmasq config for crc
INFO Will use root access: write dnsmasq configuration in /etc/NetworkManager/dnsmasq.d/crc.conf
INFO Will use root access: execute systemctl daemon-reload command
INFO Will use root access: execute systemctl stop/start command
Setup is complete, you can now run 'crc start' to start the OpenShift cluster
This setup phase is installing these packages libvirt libvirt-daemon-kvm and qemu-kvm.
Before launching the deployment, no VMs are created:
[egallen@datastation ~]$ sudo virsh list
setlocale: No such file or directory
 Id    Name                           State
----------------------------------------------------
You can copy your secret into the clipboard by clicking on “Copy pull secret”:
https://cloud.redhat.com/openshift/install/crc/installer-provisioned?intcmp=xxxxxxxx
We can start the CRC, you have to paste from your clipboard the pull secret, when it’s requested:
[egallen@datastation ~]$ ./crc start
INFO Checking if oc binary is cached
INFO Checking if running as non-root
INFO Checking if Virtualization is enabled
INFO Checking if KVM is enabled
INFO Checking if libvirt is installed
INFO Checking if user is part of libvirt group
INFO Checking if libvirt is enabled
INFO Checking if libvirt daemon is running
INFO Checking if a supported libvirt version is installed
INFO Checking if crc-driver-libvirt is installed
INFO Checking if libvirt 'crc' network is available
INFO Checking if libvirt 'crc' network is active
INFO Checking if NetworkManager is installed
INFO Checking if NetworkManager service is running
INFO Checking if /etc/NetworkManager/conf.d/crc-nm-dnsmasq.conf exists
INFO Checking if /etc/NetworkManager/dnsmasq.d/crc.conf exists
? Image pull secret [? for help] *********************************************************************************************************************************************...***********************************************************************************************************************************
INFO Extracting bundle: crc_libvirt_4.3.0.crcbundle ...
INFO Creating CodeReady Containers VM for OpenShift 4.3.0...
INFO Verifying validity of the cluster certificates ...
INFO Check internal and public DNS query ...
INFO Check DNS query from host ...
INFO Copying kubeconfig file to instance dir ...
INFO Adding user's pull secret ...
INFO Updating cluster ID ...
INFO Starting OpenShift cluster ... [waiting 3m]
INFO
INFO To access the cluster, first set up your environment by following 'crc oc-env' instructions
INFO Then you can access it by running 'oc login -u developer -p developer https://api.crc.testing:6443'
INFO To login as an admin, run 'oc login -u kubeadmin -p 7z6T5-qmTth-oxaoD-p3xQF https://api.crc.testing:6443'
INFO
INFO You can now run 'crc console' and use these credentials to access the OpenShift web console
Started the OpenShift cluster
WARN The cluster might report a degraded or error state. This is expected since several operators have been disabled to lower the resource usage. For more information, please consult the documentation
Check the deployment
A VM is created by the crc installer:
[egallen@datastation ~]$ sudo virsh list
setlocale: No such file or directory
 Id    Name                           State
----------------------------------------------------
 1     crc                            running
After the deployment, list the network created:
[egallen@datastation ~]$ sudo virsh net-list
setlocale: No such file or directory
 Name                 State      Autostart     Persistent
----------------------------------------------------------
 crc                  active     yes           yes
 default              active     yes           yes
Get the cluster IP:
[egallen@datastation ~]$ ./crc ip
192.168.130.11

[egallen@datastation ~]$ ping 192.168.130.11 -c2
PING 192.168.130.11 (192.168.130.11) 56(84) bytes of data.
64 bytes from 192.168.130.11: icmp_seq=1 ttl=64 time=0.146 ms
64 bytes from 192.168.130.11: icmp_seq=2 ttl=64 time=0.179 ms
Get environment variables:
[egallen@datastation ~]$ ./crc oc-env
export PATH="/home/egallen/.crc/bin:$PATH"
# Run this command to configure your shell:
# eval $(crc oc-env)
Load the credentials:
[egallen@datastation ~]$ export KUBECONFIG=~/.crc/machines/crc/kubeconfig
Check versions:
[egallen@datastation ~]$ ./crc version
crc version: 1.6.0+8ef676f
OpenShift version: 4.3.0 (embedded in binary)

[egallen@datastation ~]$ export PATH="/home/egallen/.crc/bin:$PATH"
The client is a 4.4:
[egallen@datastation ~]$ oc version
Client Version: v4.4.0
Server Version: 4.3.0
Kubernetes Version: v1.16.2
Check the cluster status:
[egallen@datastation ~]$ oc get nodes
NAME                 STATUS   ROLES           AGE   VERSION
crc-w6th5-master-0   Ready    master,worker   20d   v1.16.2
The monitoring cluster operator is expected to report Unknown availability:
[egallen@datastation ~]$ oc get clusterversion
NAME      VERSION   AVAILABLE   PROGRESSING   SINCE   STATUS
version   4.3.0     True        False         20d     Error while reconciling 4.3.0: the cluster operator monitoring is degraded
Test the console
Launch a console:
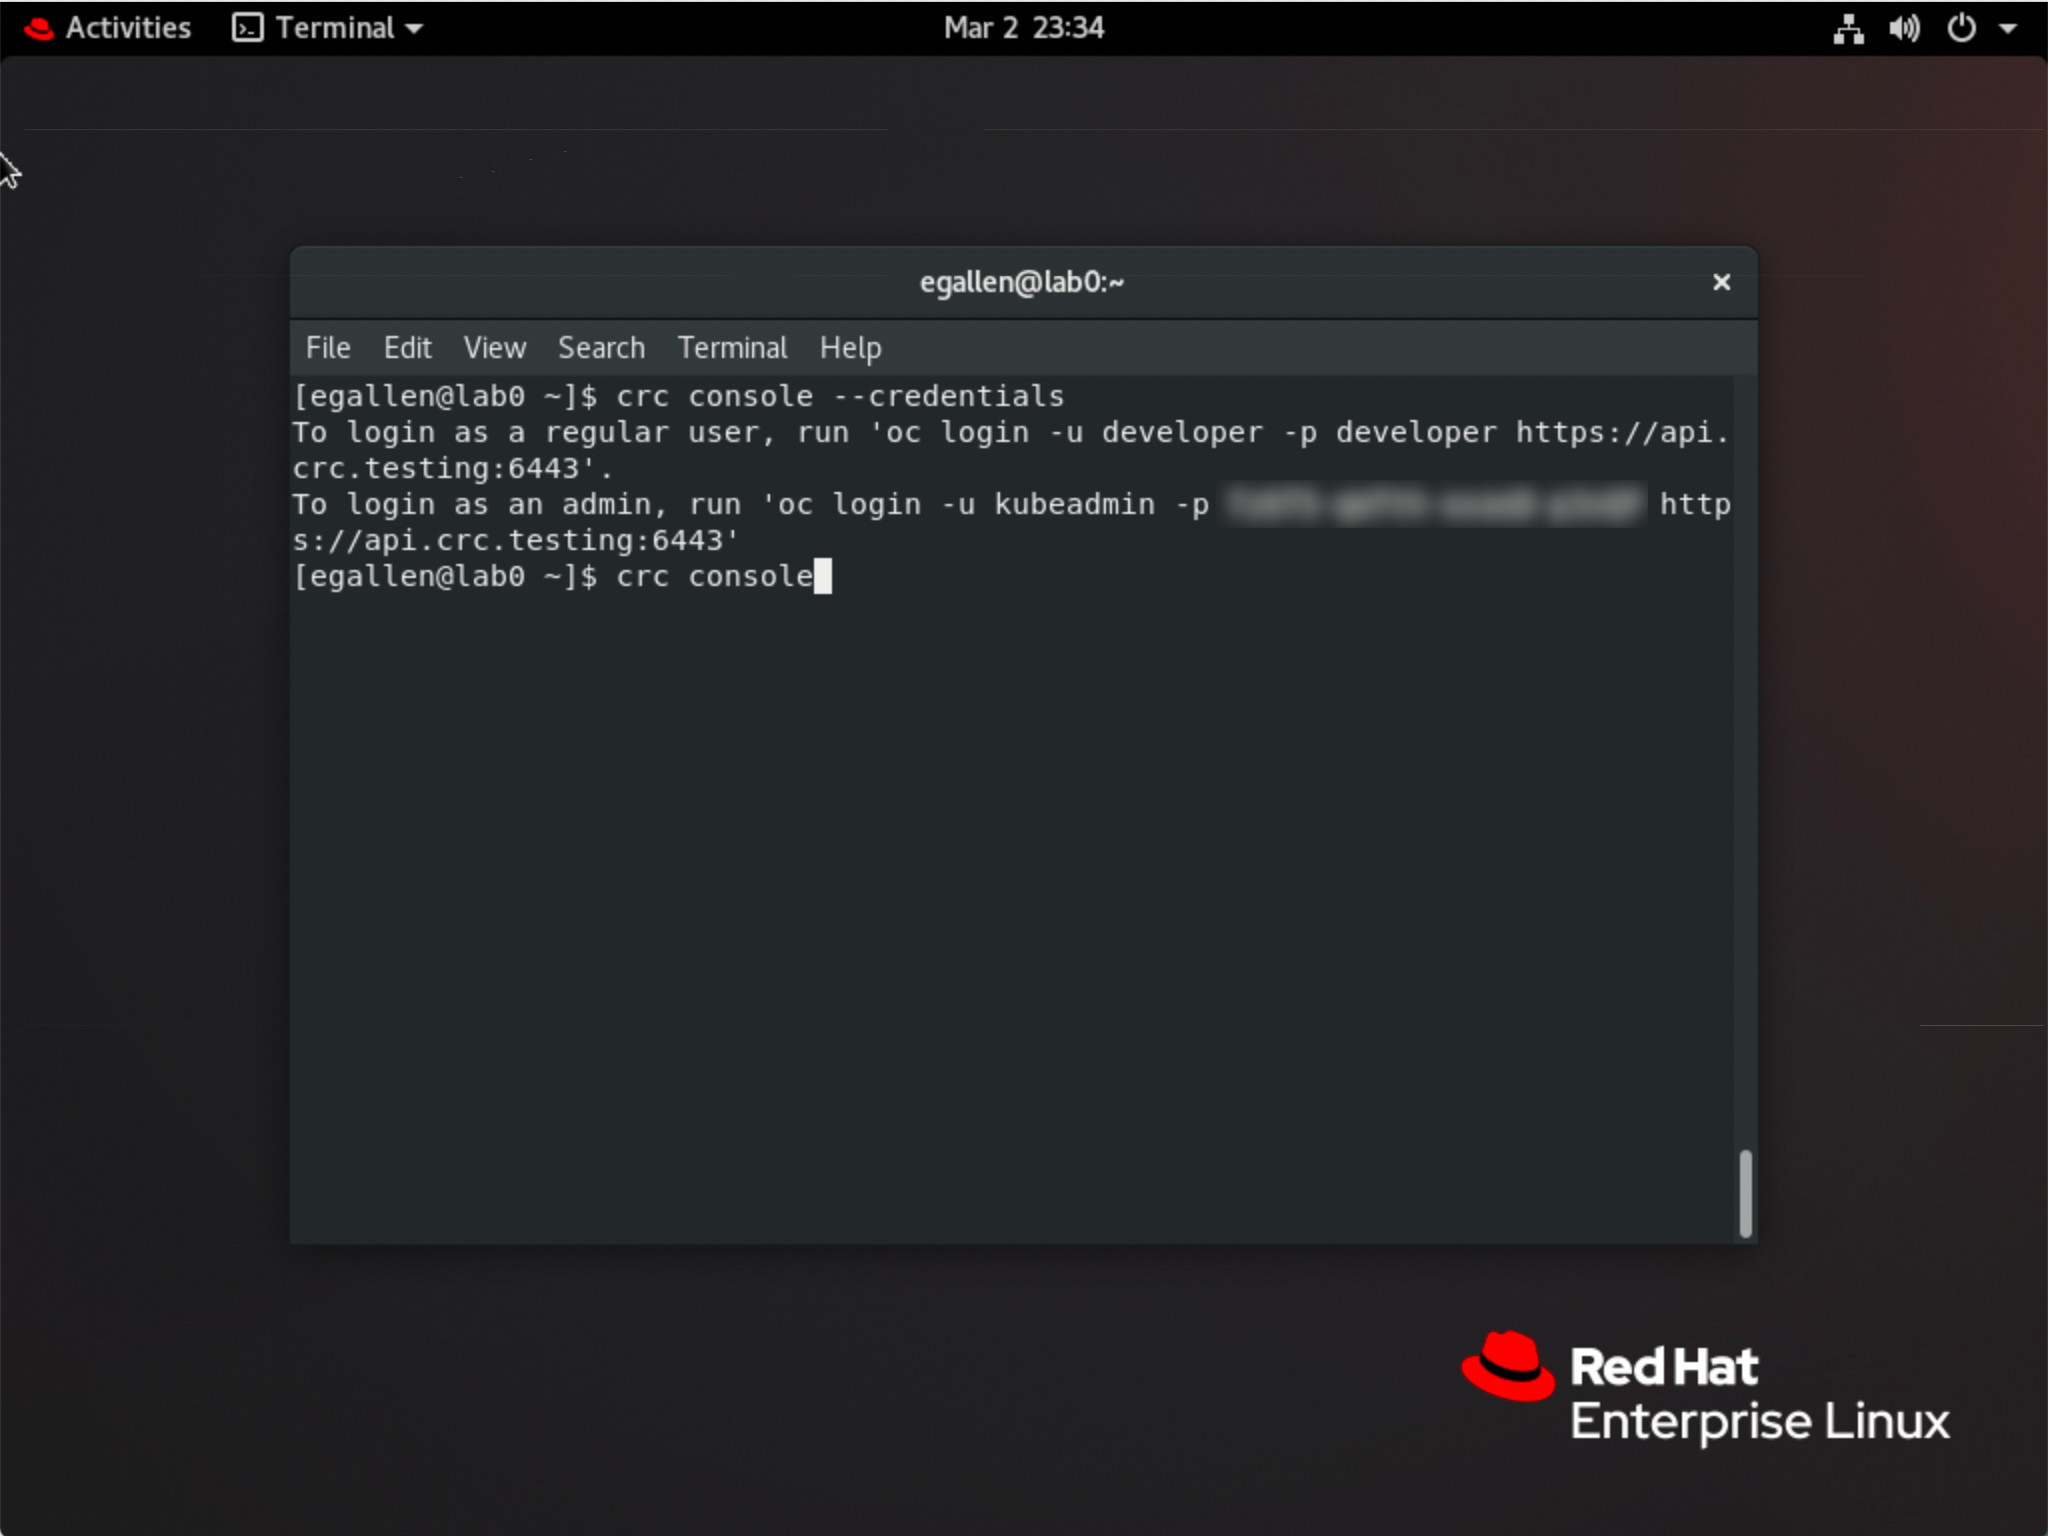
[egallen@datastation ~]$ crc console --credentials
To login as a regular user, run 'oc login -u developer -p developer https://api.crc.testing:6443'.
To login as an admin, run 'oc login -u kubeadmin -p XXXXX-XXXXX-XXXXX-XXXXXX https://api.crc.testing:6443'

[egallen@datastation ~]$ crc console
Opening the OpenShift Web Console in the default browser...
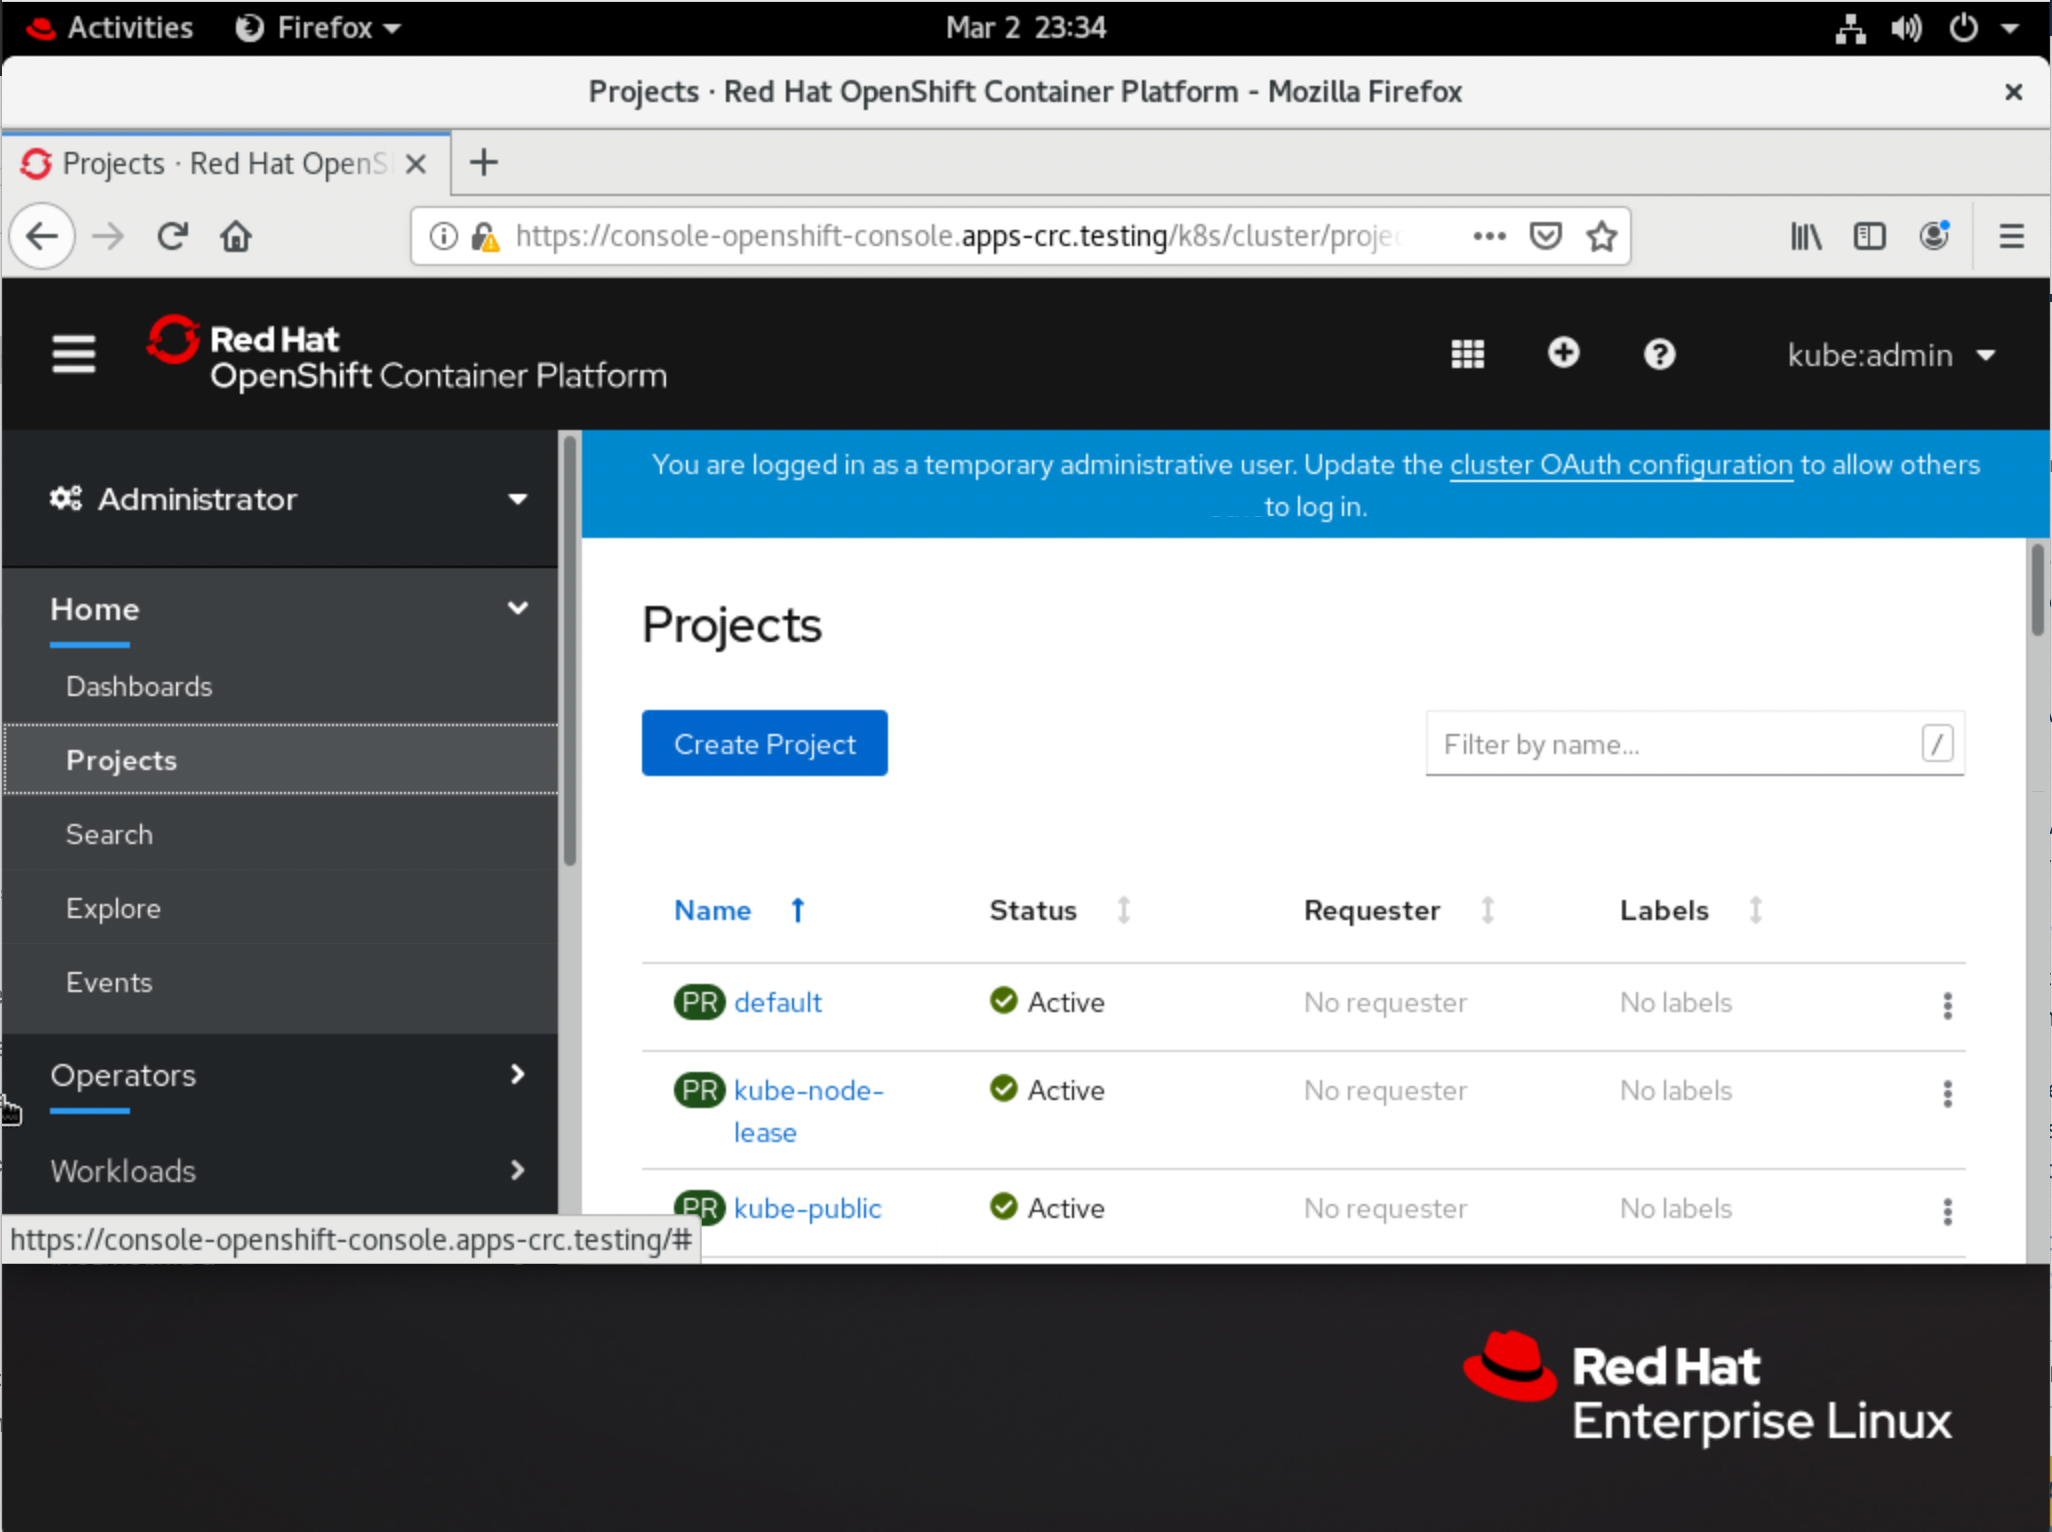
Get the credential and launch the console, the terminal is opening a Firefox:
A Firefox windows pop-up with the console:
Check the environment
This ~/.crc/ folder was created:
[egallen@datastation ~]$ tree .crc/
.crc/
|-- bin
|   |-- crc-driver-libvirt
|   `-- oc
|-- cache
|   |-- crc_libvirt_4.3.0
|   |   |-- crc-bundle-info.json
|   |   |-- crc.qcow2
|   |   |-- id_rsa_crc
|   |   |-- kubeadmin-password
|   |   `-- kubeconfig
|   `-- crc_libvirt_4.3.0.crcbundle
|-- crc.json
|-- crc.log
`-- machines
    `-- crc
        |-- config.json
        |-- crc
        |-- id_rsa
        |-- id_rsa.pub
        `-- kubeconfig

5 directories, 15 files
Memory used without the monitoring and without workloads:
[egallen@datastation ~]$ free -h
              total        used        free      shared  buff/cache   available
Mem:           15Gi       8.4Gi       221Mi        35Mi       6.6Gi       6.5Gi
Swap:         7.7Gi        18Mi       7.7Gi
We can use oc debug node command to spin up a debug container on the CRC node:
[egallen@datastation ~]$ oc debug node/crc-w6th5-master-0
Starting pod/crc-w6th5-master-0-debug ...
To use host binaries, run `chroot /host`
Pod IP: 192.168.130.11
If you don't see a command prompt, try pressing enter.
The debug container is based on RHEL 7.7 (prompt ‘sh-4.2’):
sh-4.2# grep NAME /etc/os-release
NAME="Red Hat Enterprise Linux Server"
PRETTY_NAME="Red Hat Enterprise Linux Server 7.7 (Maipo)"
CPE_NAME="cpe:/o:redhat:enterprise_linux:7.7:GA:server"

sh-4.2# cat /etc/redhat-release
Red Hat Enterprise Linux Server release 7.7 (Maipo)
Now you can chroot in the RHEL CoreOS (prompt ‘sh-4.4’):
sh-4.2# chroot /host

sh-4.4# grep NAME /etc/os-release
NAME="Red Hat Enterprise Linux CoreOS"
PRETTY_NAME="Red Hat Enterprise Linux CoreOS 43.81.202001142154.0 (Ootpa)"

sh-4.4# cat /etc/redhat-release
Red Hat Enterprise Linux CoreOS release 4.3
In a second shell, we can see the debug pod running:
[egallen@datastation ~]$ oc get pods | grep debug
crc-w6th5-master-0-debug                   1/1     Running     0          4m51
We just need to do two times “exit” to stop the debug container:
sh-4.4# exit
exit
sh-4.2# exit
exit

Removing debug pod ...
“Direct SSH access to machines is not recommended”, but it’s good to know that ssh into the RHEL CoreOS VM is doable from the KVM host:
[egallen@datastation ~]$ ssh -i ~/.crc/machines/crc/id_rsa core@192.168.130.11
The authenticity of host '192.168.130.11 (192.168.130.11)' can't be established.
ECDSA key fingerprint is SHA256:LCKNirG/TkSiUmBWWwxezYUuZgH1L3V1IXjqmOdXVpo.
Are you sure you want to continue connecting (yes/no/[fingerprint])? yes
Warning: Permanently added '192.168.130.11' (ECDSA) to the list of known hosts.
Red Hat Enterprise Linux CoreOS 43.81.202001142154.0
  Part of OpenShift 4.3, RHCOS is a Kubernetes native operating system
  managed by the Machine Config Operator (`clusteroperator/machine-config`).

WARNING: Direct SSH access to machines is not recommended; instead,
make configuration changes via `machineconfig` objects:
  https://docs.openshift.com/container-platform/4.3/architecture/architecture-rhcos.html

---
Last login: Fri Feb 14 07:11:34 2020 from 192.168.126.1
[core@crc-w6th5-master-0 ~]$
Check the release of the RHEL CoreOS deployed:
[core@crc-w6th5-master-0 ~]$ cat /etc/redhat-release
Red Hat Enterprise Linux CoreOS release 4.3

[core@crc-w6th5-master-0 ~]$ cat /etc/os-release
NAME="Red Hat Enterprise Linux CoreOS"
VERSION="43.81.202001142154.0"
VERSION_ID="4.3"
OPENSHIFT_VERSION="4.3"
RHEL_VERSION=8.0
PRETTY_NAME="Red Hat Enterprise Linux CoreOS 43.81.202001142154.0 (Ootpa)"
ID="rhcos"
ID_LIKE="rhel fedora"
ANSI_COLOR="0;31"
HOME_URL="https://www.redhat.com/"
BUG_REPORT_URL="https://bugzilla.redhat.com/"
REDHAT_BUGZILLA_PRODUCT="OpenShift Container Platform"
REDHAT_BUGZILLA_PRODUCT_VERSION="4.3"
REDHAT_SUPPORT_PRODUCT="OpenShift Container Platform"
REDHAT_SUPPORT_PRODUCT_VERSION="4.3"
OSTREE_VERSION='43.81.202001142154.0'
Check the kernel version:
[core@crc-w6th5-master-0 ~]$ uname -a
Linux crc-w6th5-master-0 4.18.0-147.3.1.el8_1.x86_64 #1 SMP Wed Nov 27 01:11:44 UTC 2019 x86_64 x86_64 x86_64 GNU/Linux
Check the PCI devices before enabling the GPU PCI Passthrough:
[core@crc-w6th5-master-0 ~]$ sudo lspci -nn
00:00.0 Host bridge [0600]: Intel Corporation 440FX - 82441FX PMC [Natoma] [8086:1237] (rev 02)
00:01.0 ISA bridge [0601]: Intel Corporation 82371SB PIIX3 ISA [Natoma/Triton II] [8086:7000]
00:01.1 IDE interface [0101]: Intel Corporation 82371SB PIIX3 IDE [Natoma/Triton II] [8086:7010]
00:01.2 USB controller [0c03]: Intel Corporation 82371SB PIIX3 USB [Natoma/Triton II] [8086:7020] (rev 01)
00:01.3 Bridge [0680]: Intel Corporation 82371AB/EB/MB PIIX4 ACPI [8086:7113] (rev 03)
00:02.0 VGA compatible controller [0300]: Cirrus Logic GD 5446 [1013:00b8]
00:03.0 Ethernet controller [0200]: Red Hat, Inc. Virtio network device [1af4:1000]
00:04.0 Communication controller [0780]: Red Hat, Inc. Virtio console [1af4:1003]
00:05.0 SCSI storage controller [0100]: Red Hat, Inc. Virtio block device [1af4:1001]
00:06.0 Unclassified device [00ff]: Red Hat, Inc. Virtio memory balloon [1af4:1002]
00:07.0 Unclassified device [00ff]: Red Hat, Inc. Virtio RNG [1af4:1005]
Check the partitions (size fixed by the installer, do not depend of your desktop disk size):
[core@crc-w6th5-master-0 ~]$ df -h
Filesystem                            Size  Used Avail Use% Mounted on
devtmpfs                              3.7G     0  3.7G   0% /dev
tmpfs                                 3.8G  168K  3.8G   1% /dev/shm
tmpfs                                 3.8G   11M  3.7G   1% /run
tmpfs                                 3.8G     0  3.8G   0% /sys/fs/cgroup
/dev/mapper/coreos-luks-root-nocrypt   31G  9.0G   22G  30% /sysroot
/dev/vda1                             364M   84M  257M  25% /boot
/dev/vda2                             127M  3.0M  124M   3% /boot/efi
tmpfs                                 760M  4.0K  760M   1% /run/user/1000
Check the name resolution:
[egallen@datastation ~]$ dig console-openshift-console.apps-crc.testing

; <<>> DiG 9.11.4-P2-RedHat-9.11.4-26.P2.el8 <<>> console-openshift-console.apps-crc.testing
;; global options: +cmd
;; Got answer:
;; ->>HEADER<<- opcode: QUERY, status: NOERROR, id: 19421
;; flags: qr aa rd ra ad; QUERY: 1, ANSWER: 1, AUTHORITY: 0, ADDITIONAL: 0

;; QUESTION SECTION:
;console-openshift-console.apps-crc.testing. IN A

;; ANSWER SECTION:
console-openshift-console.apps-crc.testing. 0 IN A 192.168.130.11

;; Query time: 0 msec
;; SERVER: 127.0.0.1#53(127.0.0.1)
;; WHEN: Fri Mar 06 08:51:00 CET 2020
;; MSG SIZE  rcvd: 76
Enable GPU with this CodeReady Containers deployment
We have one NVIDIA T4 on this desktop:
[egallen@datastation ~]$ lspci -nn | grep -i nvidia
01:00.0 3D controller [0302]: NVIDIA Corporation TU104GL [Tesla T4] [10de:1eb8] (rev a1)
We can cleanly, stop the Codeready Container cluster (it can take more than one minute):
[egallen@datastation ~]$ ./crc stop
Stopping the OpenShift cluster, this may take a few minutes...
Stopped the OpenShift cluster
Check if IOMMU is enabled, currently IOMMU is not enabled:
[egallen@datastation ~]$ sudo virt-host-validate
  QEMU: Checking for hardware virtualization                                 : PASS
  QEMU: Checking if device /dev/kvm exists                                   : PASS
  QEMU: Checking if device /dev/kvm is accessible                            : PASS
  QEMU: Checking if device /dev/vhost-net exists                             : PASS
  QEMU: Checking if device /dev/net/tun exists                               : PASS
  QEMU: Checking for cgroup 'cpu' controller support                         : PASS
  QEMU: Checking for cgroup 'cpuacct' controller support                     : PASS
  QEMU: Checking for cgroup 'cpuset' controller support                      : PASS
  QEMU: Checking for cgroup 'memory' controller support                      : PASS
  QEMU: Checking for cgroup 'devices' controller support                     : PASS
  QEMU: Checking for cgroup 'blkio' controller support                       : PASS
  QEMU: Checking for device assignment IOMMU support                         : PASS
  QEMU: Checking if IOMMU is enabled by kernel                               : WARN (IOMMU appears to be disabled in kernel. Add intel_iommu=on to kernel cmdline arguments)
To check if IOMMU is enabled, you can also look the /sys/class/iommu/ is populated, if not, IOMMU is not enabled:
[egallen@datastation ~]$ sudo find /sys | grep dmar | head -10
[egallen@datastation ~]$
Nouveau module is currently used by the system, it’s not good if you want to make a PCI Passthrough from a VM:
[root@datastation egallen]# lsmod | grep nouveau
nouveau              2215936  1
mxm_wmi                16384  1 nouveau
ttm                   110592  1 nouveau
i2c_algo_bit           16384  2 i915,nouveau
drm_kms_helper        217088  2 i915,nouveau
drm                   524288  9 drm_kms_helper,i915,ttm,nouveau
wmi                    32768  2 mxm_wmi,nouveau
video                  45056  2 i915,nouveau
Enable IOMMU and disable Nouveau driver
GRUB2, with RHEL8, builds the various kernel boot entries using a new specification called BLS 1. The /etc/grub2.cfg file no longer has various menuentry entries.
Check the current kernel used:
[egallen@datastation ~]$ sudo grubby --default-kernel
/boot/vmlinuz-4.18.0-147.5.1.el8_1.x86_64
Check the index number of the default kernel:
[egallen@datastation ~]$ sudo grubby --default-index
0
Check the grub configuration of the DEFAULT index before the change:
[egallen@datastation ~]$ sudo grubby --info=DEFAULT
index=0
kernel="/boot/vmlinuz-4.18.0-147.5.1.el8_1.x86_64"
args="ro crashkernel=auto resume=/dev/mapper/rhel-swap rd.lvm.lv=rhel/root rd.lvm.lv=rhel/swap rhgb quiet $tuned_params"
root="/dev/mapper/rhel-root"
initrd="/boot/initramfs-4.18.0-147.5.1.el8_1.x86_64.img $tuned_initrd"
title="Red Hat Enterprise Linux (4.18.0-147.5.1.el8_1.x86_64) 8.1 (Ootpa)"
id="1ccc12744a5843daa9e66eda0ed6011b-4.18.0-147.5.1.el8_1.x86_64"
We can blacklist the nouveau driver, and enable IOMMU:
[egallen@datastation ~]$ sudo grubby --args="rd.driver.blacklist=nouveau intel_iommu=on iommu=pt" --update-kernel DEFAULT
Check the grub configuration after the change:
[egallen@datastation ~]$ sudo grubby --info=DEFAULT
index=0
kernel="/boot/vmlinuz-4.18.0-147.5.1.el8_1.x86_64"
args="ro crashkernel=auto resume=/dev/mapper/rhel-swap rd.lvm.lv=rhel/root rd.lvm.lv=rhel/swap rhgb quiet $tuned_params rd.driver.blacklist=nouveau intel_iommu=on iommu=pt"
root="/dev/mapper/rhel-root"
initrd="/boot/initramfs-4.18.0-147.5.1.el8_1.x86_64.img $tuned_initrd"
title="Red Hat Enterprise Linux (4.18.0-147.5.1.el8_1.x86_64) 8.1 (Ootpa)"
id="1ccc12744a5843daa9e66eda0ed6011b-4.18.0-147.5.1.el8_1.x86_64"
Check if the change is applied:
[egallen@datastation ~]$ sudo grep -r "rd.driver.blacklist=nouveau intel_iommu=on iommu=pt"  /boot/loader/entries/
/boot/loader/entries/1ccc12744a5843daa9e66eda0ed6011b-4.18.0-147.5.1.el8_1.x86_64.conf:options root=/dev/mapper/rhel-root ro crashkernel=auto resume=/dev/mapper/rhel-swap rd.lvm.lv=rhel/root rd.lvm.lv=rhel/swap rhgb quiet $tuned_params rd.driver.blacklist=nouveau intel_iommu=on iommu=pt
Blacklist the nouveau module:
[egallen@datastation ~]$ echo "blacklist nouveau" | sudo tee /etc/modprobe.d/nouveau-blacklist.conf
blacklist nouveau

[egallen@datastation ~]$ cat  /etc/modprobe.d/nouveau-blacklist.conf
blacklist nouveau
Reboot:
[egallen@datastation ~]$ sudo init 6
Reconnect after the reboot, and check the iommu enablement, it’s good, now “Checking if IOMMU is enabled by kernel” is “PASS”:
[egallen@datastation ~]$ virt-host-validate
  QEMU: Checking for hardware virtualization                                 : PASS
  QEMU: Checking if device /dev/kvm exists                                   : PASS
  QEMU: Checking if device /dev/kvm is accessible                            : PASS
  QEMU: Checking if device /dev/vhost-net exists                             : PASS
  QEMU: Checking if device /dev/net/tun exists                               : PASS
  QEMU: Checking for cgroup 'cpu' controller support                         : PASS
  QEMU: Checking for cgroup 'cpuacct' controller support                     : PASS
  QEMU: Checking for cgroup 'cpuset' controller support                      : PASS
  QEMU: Checking for cgroup 'memory' controller support                      : PASS
  QEMU: Checking for cgroup 'devices' controller support                     : PASS
  QEMU: Checking for cgroup 'blkio' controller support                       : PASS
  QEMU: Checking for device assignment IOMMU support                         : PASS
  QEMU: Checking if IOMMU is enabled by kernel                               : PASS
We can also find the DMAR table:
[egallen@datastation ~]$ sudo find /sys | grep dmar | head -10
/sys/class/iommu/dmar0
/sys/class/iommu/dmar1
/sys/devices/virtual/iommu/dmar0
/sys/devices/virtual/iommu/dmar0/uevent
/sys/devices/virtual/iommu/dmar0/power
/sys/devices/virtual/iommu/dmar0/power/runtime_active_time
/sys/devices/virtual/iommu/dmar0/power/runtime_status
/sys/devices/virtual/iommu/dmar0/power/autosuspend_delay_ms
/sys/devices/virtual/iommu/dmar0/power/runtime_suspended_time
/sys/devices/virtual/iommu/dmar0/power/control
...
Setup the PCI Passthrough
We have one NVIDIA GPU visible on the host:
[egallen@datastation ~]$ lspci -nn | egrep -i 'nvidia'
01:00.0 3D controller [0302]: NVIDIA Corporation TU104GL [Tesla T4] [10de:1eb8] (rev a1)
Get the bus info:
[egallen@datastation ~]$ sudo lshw -class display -businfo
Bus info          Device      Class          Description
========================================================
pci@0000:01:00.0              display        TU104GL [Tesla T4]
pci@0000:00:02.0              display        HD Graphics 630
Check if we can find the nodedev:
[egallen@datastation ~]$ sudo virsh nodedev-list --cap pci |grep pci_0000_01_00_0
pci_0000_01_00_0
Get the nodevev XML dump:
[egallen@datastation ~]$ virsh nodedev-dumpxml pci_0000_01_00_0
<device>
  <name>pci_0000_01_00_0</name>
  <path>/sys/devices/pci0000:00/0000:00:01.0/0000:01:00.0</path>
  <parent>pci_0000_00_01_0</parent>
  <driver>
    <name>nouveau</name>
  </driver>
  <capability type='pci'>
    <domain>0</domain>
    <bus>1</bus>
    <slot>0</slot>
    <function>0</function>
    <product id='0x1eb8'>TU104GL [Tesla T4]</product>
    <vendor id='0x10de'>NVIDIA Corporation</vendor>
    <capability type='virt_functions' maxCount='16'/>
    <iommuGroup number='1'>
      <address domain='0x0000' bus='0x00' slot='0x01' function='0x0'/>
      <address domain='0x0000' bus='0x01' slot='0x00' function='0x0'/>
    </iommuGroup>
  </capability>
</device>
Convert slot and function values to hexadecimal values (from decimal) to get the PCI bus addresses. Append “0x” to the beginning of the output to tell the computer that the value is a hexadecimal number.
Here, bus = 1, slot = 0 and function = 0 run the following:
[egallen@datastation ~]$ printf %x 1
1
[egallen@datastation ~]$ printf %x 0
0
The values are:
- bus=‘0x01’
- slot=‘0x00’
- function=‘0x00’
Detach the node device from its device driver before assigning to a guest domain:
[egallen@datastation ~]$ sudo virsh nodedev-dettach pci_0000_01_00_0
Device pci_0000_01_00_0 detached
The VM should be stopped at this step, if not stop, stop it with “crc stop”.
Run virsh edit and add this configuration after with the good indentation:
[egallen@datastation ~]$ sudo virsh edit crc
...
  <devices>
    <hostdev mode='subsystem' type='pci' managed='yes'>
      <source>
        <address domain='0x0000' bus='0x01' slot='0x00' function='0x00'/>
      </source>
    </hostdev>
...
You should have a warning, type “i”:
[egallen@datastation ~]$ sudo virsh edit crc
setlocale: No such file or directory
error: XML document failed to validate against schema: Unable to validate doc against /usr/share/libvirt/schemas/domain.rng
Extra element devices in interleave
Element domain failed to validate content

Failed. Try again? [y,n,i,f,?]:
y - yes, start editor again
n - no, throw away my changes
i - turn off validation and try to redefine again
f - force, try to redefine again
? - print this help
Failed. Try again? [y,n,i,f,?]: i
Domain crc XML configuration edited.
Currently with have no VM running:
[egallen@datastation crc-linux-1.6.0-amd64]$ sudo virsh list
 Id    Name                           State
----------------------------------------------------
Start the cluster:
[egallen@datastation ~]$ ./crc start
INFO Checking if oc binary is cached
INFO Checking if running as non-root
INFO Checking if Virtualization is enabled
INFO Checking if KVM is enabled
INFO Checking if libvirt is installed
INFO Checking if user is part of libvirt group
INFO Checking if libvirt is enabled
INFO Checking if libvirt daemon is running
INFO Checking if a supported libvirt version is installed
INFO Checking if crc-driver-libvirt is installed
INFO Checking if libvirt 'crc' network is available
INFO Checking if libvirt 'crc' network is active
INFO Checking if NetworkManager is installed
INFO Checking if NetworkManager service is running
INFO Checking if /etc/NetworkManager/conf.d/crc-nm-dnsmasq.conf exists
INFO Checking if /etc/NetworkManager/dnsmasq.d/crc.conf exists
INFO Starting CodeReady Containers VM for OpenShift 4.3.0...
INFO Verifying validity of the cluster certificates ...
INFO Check internal and public DNS query ...
INFO Check DNS query from host ...
INFO Starting OpenShift cluster ... [waiting 3m]
INFO
INFO To access the cluster, first set up your environment by following 'crc oc-env' instructions
INFO Then you can access it by running 'oc login -u developer -p developer https://api.crc.testing:6443'
INFO To login as an admin, run 'oc login -u kubeadmin -p 7z6T5-qmTth-oxaoD-p3xQF https://api.crc.testing:6443'
INFO
INFO You can now run 'crc console' and use these credentials to access the OpenShift web console
Started the OpenShift cluster
WARN The cluster might report a degraded or error state. This is expected since several operators have been disabled to lower the resource usage. For more information, please consult the documentation
Connect in the VM and try to find the NVIDIA card:
[egallen@datastation ~]$ oc debug node/crc-w6th5-master-0
sh-4.2# chroot /host
sh-4.4# lspci -nn | grep -i nvidia
00:08.0 3D controller [0302]: NVIDIA Corporation TU104GL [Tesla T4] [10de:1eb8] (rev a1)
Universal Base Image entitlement
Red Hat uses the subscription model to allow customers to download Red Hat tested and certified enterprise software. This way customers are supplied with the latest patches, bug fixes, updates and upgrades.
UBI is a subset of packages of a RHEL distribution, to have all needed packages to build a sophisticated container image, the build needs access to all repositories and this is where entitled builds can help.
Go to : https//access.redhat.com, and download the subscription of your RHEL node:
[egallen@datastation ~]$ unzip abcdefg-hijkl-mnopq-rstu-vwxyz_certificates.zip
Archive:  abcdefg-hijkl-mnopq-rstu-vwxyz_certificates.zip
signed Candlepin export for abcdefg-hijkl-mnopq-rstu-vwxyz
  inflating: consumer_export.zip
  inflating: signature
Unzip the subscription file:
[egallen@datastation ~]$ unzip consumer_export.zip
Archive:  consumer_export.zip
Candlepin export for abcdefg-hijkl-mnopq-rstu-vwxyz
  inflating: export/meta.json
  inflating: export/entitlement_certificates/01010101010101010.pem

stack@perflab-director openshift]$ ls export/entitlement_certificates/01010101010101010.pem
01010101010101010.pem
Check your private keys:
[egallen@datastation ~]$  cat export/entitlement_certificates/01010101010101010.pem
-----BEGIN CERTIFICATE-----
XxXxXxXxXxXxXxXxXxXxXxXxXxXxXxXxXxXxXxXxXxXxXxXxXxXxXxXxXxXxXxXx
XxXxXxXxXxXxXxXxXxXxXxXxXxXxXxXxXxXxXxXxXxXxXxXxXxXxXxXxXxXxXxXx
XxXxXxXxXxXxXxXxXxXxXxXxXxXxXxXxXxXxXxXxXxXxXxXxXxXxXxXxXxXxXxXx
XxXxXxXxXxXxXxXxXxXxXxXxXxXxXxXxXxXxXxXxXxXxXxXxXxXxXxXxXxXxXxXx
XxXxXxXxXxXxXxXxXxXxXxXxXxXxXxXxXxXxXxXxXxXxXxXxXxXxXxXxXxXxXxXx
XxXxXxXxXxXxXxXxXxXxXxXxXxXxXxXxXxXxXxXxXxXxXxXxXxXxXxXxXxXxXxXx
XxXxXxXxXxXxXxXxXxXxXxXxXxXxXxXxXxXxXxXxXxXxXxXxXxXxXxXxXxXxXxXx
XxXxXxXxXxXxXxXxXxXxXxXxXxXxXxXxXxXxXxXxXxXxXxXxXxXxXxXxXxXxXxXx
XxXxXxXxXxXxXxXxXxXxXxXxXxXxXxXxXxXxXxXxXxXxXxXxXxXxXxXxXxXxXxXx
-----END CERTIFICATE-----
-----BEGIN ENTITLEMENT DATA----
XxXxXxXxXxXxXxXxXxXxXxXxXxXxXxXxXxXxXxXxXxXxXxXxXxXxXxXxXxXxXxXx
XxXxXxXxXxXxXxXxXxXxXxXxXxXxXxXxXxXxXxXxXxXxXxXxXxXxXxXxXxXxXxXx
XxXxXxXxXxXxXxXxXxXxXxXxXxXxXxXxXxXxXxXxXxXxXxXxXxXxXxXxXxXxXxXx
XxXxXxXxXxXxXxXxXxXxXxXxXxXxXxXxXxXxXxXxXxXxXxXxXxXxXxXxXxXxXxXx
XxXxXxXxXxXxXxXxXxXxXxXxXxXxXxXxXxXxXxXxXxXxXxXxXxXxXxXxXxXxXxXx
XxXxXxXxXxXxXxXxXxXxXxXxXxXxXxXxXxXxXxXxXxXxXxXxXxXxXxXxXxXxXxXx
XxXxXxXxXxXxXxXxXxXxXxXxXxXxXxXxXxXxXxXxXxXxXxXxXxXxXxXxXxXxXxXx
-----END ENTITLEMENT DATA-----
-----BEGIN RSA SIGNATURE-----
XxXxXxXxXxXxXxXxXxXxXxXxXxXxXxXxXxXxXxXxXxXxXxXxXxXxXxXxXxXxXxXx
XxXxXxXxXxXxXxXxXxXxXxXxXxXxXxXxXxXxXxXxXxXxXxXxXxXxXxXxXxXxXxXx
XxXxXxXxXxXxXxXxXxXxXxXxXxXxXxXxXxXxXxXxXxXxXxXxXxXxXxXxXxXxXxXx
XxXxXxXxXxXxXxXxXxXxXxXxXxXxXxXxXxXxXxXxXxXxXxXxXxXxXxXxXxXxXxXx
-----END RSA SIGNATURE-----
-----BEGIN RSA PRIVATE KEY-----
XxXxXxXxXxXxXxXxXxXxXxXxXxXxXxXxXxXxXxXxXxXxXxXxXxXxXxXxXxXxXxXx
XxXxXxXxXxXxXxXxXxXxXxXxXxXxXxXxXxXxXxXxXxXxXxXxXxXxXxXxXxXxXxXx
XxXxXxXxXxXxXxXxXxXxXxXxXxXxXxXxXxXxXxXxXxXxXxXxXxXxXxXxXxXxXxXx
XxXxXxXxXxXxXxXxXxXxXxXxXxXxXxXxXxXxXxXxXxXxXxXxXxXxXxXxXxXxXxXx
XxXxXxXxXxXxXxXxXxXxXxXxXxXxXxXxXxXxXxXxXxXxXxXxXxXxXxXxXxXxXxXx
XxXxXxXxXxXxXxXxXxXxXxXxXxXxXxXxXxXxXxXxXxXxXxXxXxXxXxXxXxXxXxXx
XxXxXxXxXxXxXxXxXxXxXxXxXxXxXxXxXxXxXxXxXxXxXxXxXxXxXxXxXxXxXxXx
-----END RSA PRIVATE KEY-----
Encode in BASE64 your file:
[egallen@datastation ~]$ base64 -w 0 01010101010101010.pem > 01010101010101010_base64.pem
Download the entitlement yaml:
[egallen@datastation ~]$ wget https://raw.githubusercontent.com/openshift-psap/blog-artifacts/master/how-to-use-entitled-builds-with-ubi/0003-cluster-wide-machineconfigs.yaml.template
Add your base64 encoded private keys in the yaml:
[egallen@datastation ~]$ cp 0003-cluster-wide-machineconfigs.yaml.template 0003-cluster-wide-machineconfigs.yaml

[egallen@datastation ~]$ sed -i '/BASE64_ENCODED_PEM_FILE/r 01010101010101010_base64.pem' 0003-cluster-wide-machineconfigs.yaml

[egallen@datastation ~]$ sed -i ':a;N;$!ba;s/BASE64_ENCODED_PEM_FILE\n//g' 0003-cluster-wide-machineconfigs.yaml
Take the 5 last characters of 01010101010101010_base64.pem
[egallen@datastation ~]$ cat 01010101010101010_base64.pem

[egallen@datastation ~]$ sed -i 's/tLS0K        filesystem: root/tLS0K\n        filesystem: root/g' 0003-cluster-wide-machineconfigs.yaml
Check before, no subscription files in the RHEL CoreOS VM:
[egallen@datastation ~]$ oc debug node/crc-w6th5-master-0
sh-4.2# chroot /host
sh-4.4# ls -la /etc/rhsm/rhsm.conf /etc/pki/entitlement/entitlement.pem /etc/pki/entitlement/entitlement-key.pem
ls: cannot access '/etc/rhsm/rhsm.conf': No such file or directory
ls: cannot access '/etc/pki/entitlement/entitlement.pem': No such file or directory
ls: cannot access '/etc/pki/entitlement/entitlement-key.pem': No such file or directory
Download the testing yaml:
[egallen@datastation ~]$ wget https://raw.githubusercontent.com/openshift-psap/blog-artifacts/master/how-to-use-entitled-builds-with-ubi/0004-cluster-wide-entitled-pod.yaml
Launch the test, as expected no subscription enabled:
[egallen@datastation ~]$ oc create -f 0004-cluster-wide-entitled-pod.yaml
pod/cluster-entitled-build-pod created

[egallen@datastation ~]$ oc get pods
NAME                         READY   STATUS              RESTARTS   AGE
cluster-entitled-build-pod   0/1     ContainerCreating   0          12s

[egallen@datastation ~]$ oc logs cluster-entitled-build-pod
Updating Subscription Management repositories.
Unable to read consumer identity
Subscription Manager is operating in container mode.
This system is not registered to Red Hat Subscription Management. You can use subscription-manager to register.
Red Hat Universal Base Image 8 (RPMs) - BaseOS  652 kB/s | 761 kB     00:01
Red Hat Universal Base Image 8 (RPMs) - AppStre 2.6 MB/s | 3.4 MB     00:01
Red Hat Universal Base Image 8 (RPMs) - CodeRea 7.1 kB/s | 9.1 kB     00:01
No matches found.
Delete the test:
[egallen@datastation ~]$ oc delete -f 0004-cluster-wide-entitled-pod.yaml
pod "cluster-entitled-build-pod" deleted
Show mc status before:
[egallen@datastation ~]$ oc get machineconfig | grep entitlement
[egallen@datastation ~]$
Now let’s entitle your cluster:
[egallen@datastation ~]$ oc create -f 0003-cluster-wide-machineconfigs.yaml
machineconfig.machineconfiguration.openshift.io/50-rhsm-conf created
machineconfig.machineconfiguration.openshift.io/50-entitlement-pem created
machineconfig.machineconfiguration.openshift.io/50-entitlement-key-pem created
Check the machine config configuration:
[egallen@datastation ~]$ oc get machineconfig 50-entitlement-key-pem -o yaml |grep -i path:
        path: /etc/pki/entitlement/entitlement-key.pem
[egallen@datastation c~]$ oc get machineconfig 50-entitlement-pem -o yaml |grep -i path:
        path: /etc/pki/entitlement/entitlement.pem
[egallen@datastation ~]$ oc get machineconfig 50-rhsm-conf  -o yaml |grep -i path:
        path: /etc/rhsm/rhsm.conf
Setup in progress:
[egallen@datastation ~]$ oc get machineconfig | grep entitlement
50-entitlement-key-pem                                                                                 2.2.0             15s
50-entitlement-pem                                                                                     2.2.0             15s
Test again the entitlement status:
[egallen@datastation ~]$ oc create -f 0004-cluster-wide-entitled-pod.yaml
pod/cluster-entitled-build-pod created

[egallen@datastation ~]$ oc logs cluster-entitled-build-pod
Updating Subscription Management repositories.
Unable to read consumer identity
Subscription Manager is operating in container mode.
Red Hat Enterprise Linux 8 for x86_64 - BaseOS   11 MB/s |  14 MB     00:01
Red Hat Enterprise Linux 8 for x86_64 - AppStre  12 MB/s |  14 MB     00:01
Red Hat Universal Base Image 8 (RPMs) - BaseOS  252 kB/s | 761 kB     00:03
Red Hat Universal Base Image 8 (RPMs) - AppStre 2.7 MB/s | 3.4 MB     00:01
Red Hat Universal Base Image 8 (RPMs) - CodeRea 7.3 kB/s | 9.1 kB     00:01
====================== Name Exactly Matched: kernel-devel ======================
kernel-devel-4.18.0-80.1.2.el8_0.x86_64 : Development package for building
                                        : kernel modules to match the kernel
kernel-devel-4.18.0-80.el8.x86_64 : Development package for building kernel
                                  : modules to match the kernel
kernel-devel-4.18.0-80.4.2.el8_0.x86_64 : Development package for building
                                        : kernel modules to match the kernel
kernel-devel-4.18.0-80.7.1.el8_0.x86_64 : Development package for building
                                        : kernel modules to match the kernel
kernel-devel-4.18.0-80.11.1.el8_0.x86_64 : Development package for building
                                         : kernel modules to match the kernel
kernel-devel-4.18.0-147.el8.x86_64 : Development package for building kernel
                                   : modules to match the kernel
kernel-devel-4.18.0-80.11.2.el8_0.x86_64 : Development package for building
                                         : kernel modules to match the kernel
kernel-devel-4.18.0-80.7.2.el8_0.x86_64 : Development package for building
                                        : kernel modules to match the kernel
kernel-devel-4.18.0-147.0.3.el8_1.x86_64 : Development package for building
                                         : kernel modules to match the kernel
kernel-devel-4.18.0-147.0.2.el8_1.x86_64 : Development package for building
                                         : kernel modules to match the kernel
kernel-devel-4.18.0-147.3.1.el8_1.x86_64 : Development package for building
                                         : kernel modules to match the kernel
kernel-devel-4.18.0-147.5.1.el8_1.x86_64 : Development package for building
                                         : kernel modules to match the kernel
Check if the entitlement files are created:
[egallen@datastation ~]$ oc debug node/crc-w6th5-master-0
sh-4.2# chroot /host
sh-4.4#  ls -la /etc/rhsm/rhsm.conf /etc/pki/entitlement/entitlement.pem   /etc/pki/entitlement/entitlement-key.pem
-rw-r--r--. 1 root root 140277 Mar  7 09:48 /etc/pki/entitlement/entitlement-key.pem
-rw-r--r--. 1 root root 140277 Mar  7 09:49 /etc/pki/entitlement/entitlement.pem
-rw-r--r--. 1 root root   2851 Mar  7 09:49 /etc/rhsm/rhsm.conf
Deploy the GPU operator
The GPU operator manages NVIDIA GPU resources in a Kubernetes cluster and automates tasks related to bootstrapping GPU nodes.
We will apply this gpu-operator procedure: https://nvidia.github.io/gpu-operator/
Download the Helm binary:
[egallen@datastation ~]$ curl https://mirror.openshift.com/pub/openshift-v4/clients/helm/latest/helm-linux-amd64 -o helm
Add the execution right:
[egallen@datastation bin]$ sudo chmod 755 helm
Check helm version:
[egallen@datastation ~]$ ./helm version
version.BuildInfo{Version:"v3.1+unreleased", GitCommit:"7ebdbb86fca32c77f2fce166f7f9e58ebf7e9946", GitTreeState:"clean", GoVersion:"go1.13.4"}
Add the NVIDIA repo to helm:
[egallen@datastation ~]$ ./helm repo add nvidia https://nvidia.github.io/gpu-operator
"nvidia" has been added to your repositories
Update helm repositories:
[egallen@datastation ~]$ ./helm repo update
Hang tight while we grab the latest from your chart repositories...
...Successfully got an update from the "nvidia" chart repository
Update Complete. ⎈ Happy Helming!⎈
No previous helm gpu-operator lanches, if it’s the case do " helm uninstall gpu-operator-X-XXXXXXXXX -n openshift-operators"
[egallen@datastation ~]$ ./helm list --all --all-namespaces
NAME  NAMESPACE REVISION  UPDATED STATUS  CHART APP VERSION
Install the gpu-operator:
[egallen@datastation ~]$ ./helm install --devel nvidia/gpu-operator --set platform.openshift=true,operator.defaultRuntime=crio --wait --generate-name
NAME: gpu-operator-1583580048
LAST DEPLOYED: Sat Mar  7 12:20:49 2020
NAMESPACE: default
STATUS: deployed
REVISION: 1
TEST SUITE: None
Configuration is starting:
[egallen@datastation ~]$ ./helm list --all --all-namespaces
NAME                    NAMESPACE REVISION  UPDATED                                 STATUS    CHART               APP VERSION
gpu-operator-1583580048 default   1         2020-03-07 12:20:49.320119471 +0100 CET deployed  gpu-operator-1.0.0  1.0.0       ./helm list --all --all-namespaces
A NFD operator is installed and has tagged the node:
[egallen@datastation ~]$ oc describe node | egrep 'Roles|pci'
Roles:              master,worker
                    feature.node.kubernetes.io/pci-1013.present=true
                    feature.node.kubernetes.io/pci-10de.present=true
We will follow the steps:
[egallen@datastation ~]$ oc get pods -n gpu-operator-resources
NAME                                       READY   STATUS              RESTARTS   AGE
nvidia-container-toolkit-daemonset-z2swm   1/1     Running             0          34s
nvidia-driver-daemonset-8llsb              0/1     ContainerCreating   0          16s
[egallen@datastation ~]$ oc get pods -n gpu-operator-resources
NAME                                       READY   STATUS              RESTARTS   AGE
nvidia-container-toolkit-daemonset-z2swm   1/1     Running             0          44s
nvidia-driver-daemonset-8llsb              1/1     Running             0          26s
nvidia-driver-validation                   0/1     ContainerCreating   0          1s
[egallen@datastation ~]$ oc get pods -n gpu-operator-resources
NAME                                       READY   STATUS              RESTARTS   AGE
nvidia-container-toolkit-daemonset-z2swm   1/1     Running             0          3m7s
nvidia-device-plugin-daemonset-c6gjg       0/1     ContainerCreating   0          4s
nvidia-driver-daemonset-8llsb              1/1     Running             0          2m49s
nvidia-driver-validation                   0/1     Completed           0          2m24s
[egallen@datastation ~]$ oc get pods -n gpu-operator-resources
NAME                                       READY   STATUS      RESTARTS   AGE
nvidia-container-toolkit-daemonset-z2swm   1/1     Running     0          3m35s
nvidia-device-plugin-daemonset-c6gjg       1/1     Running     0          32s
nvidia-device-plugin-validation            0/1     Completed   0          17s
nvidia-driver-daemonset-8llsb              1/1     Running     0          3m17s
nvidia-driver-validation                   0/1     Completed   0          2m52s
When the configuration is completed, you should see the log “Test PASSED”:
[egallen@datastation ~]$ oc logs nvidia-driver-validation  -n gpu-operator-resources
> Using CUDA Device [0]: Tesla T4
> GPU Device has SM 7.5 compute capability
[Vector addition of 50000 elements]
Copy input data from the host memory to the CUDA device
CUDA kernel launch with 196 blocks of 256 threads
Copy output data from the CUDA device to the host memory
Test PASSED
Done
Check if you have some “nvidia.com/gpu”
[egallen@datastation ~]$ oc describe node | egrep -A7 'Capacity:|Allocatable:' | egrep  'Capacity:|Allocatable:|gpu|cpu'
Capacity:
  cpu:                4
  nvidia.com/gpu:     1
Allocatable:
  cpu:                3500m
  nvidia.com/gpu:     1
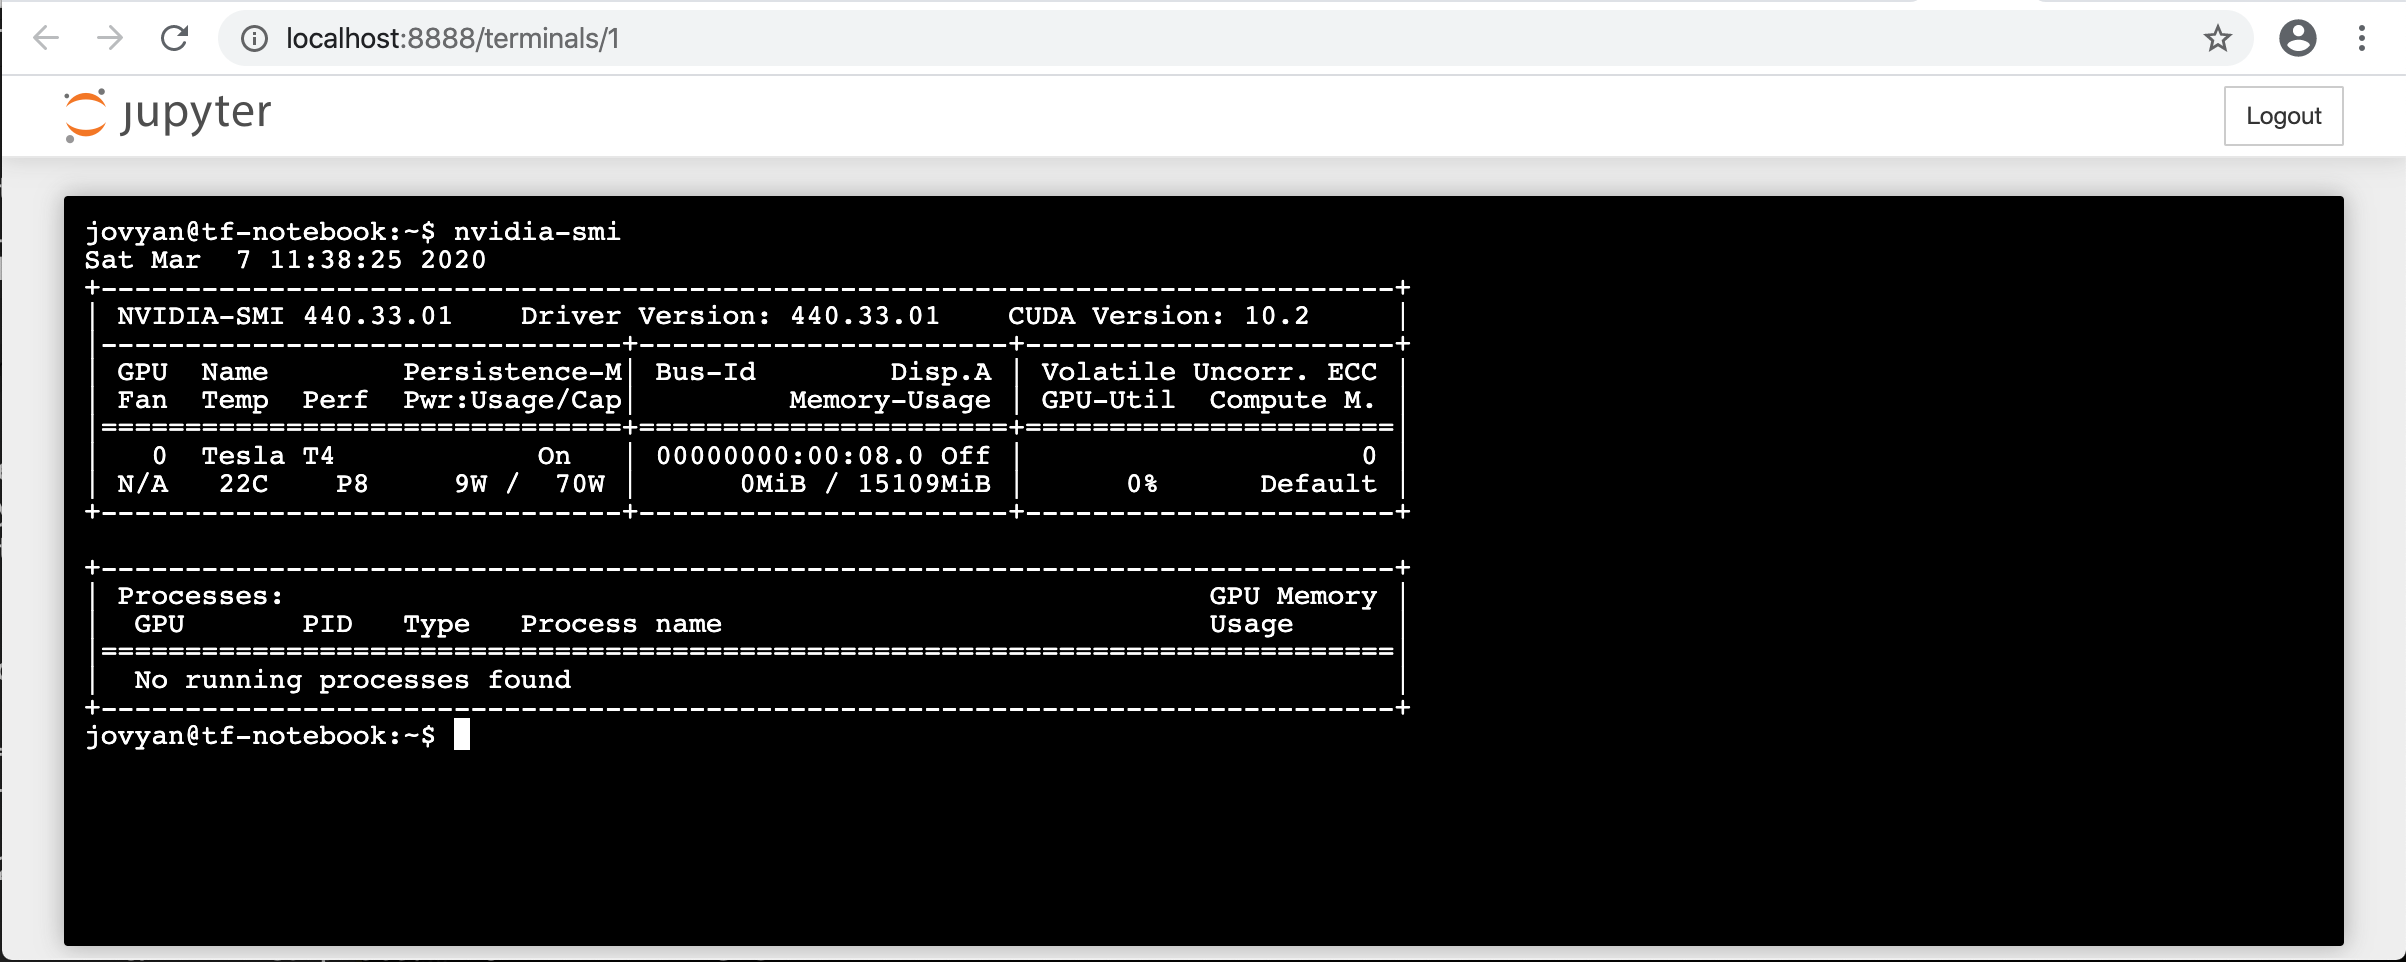
Test the command line utility NVIDIA System Management Interface (nvidia-smi):
[egallen@datastation ~]$ oc project gpu-operator-resources
Now using project "gpu-operator-resources" on server "https://api.crc.testing:6443".

[egallen@datastation ~]$ oc exec -it nvidia-driver-daemonset-8llsb nvidia-smi
Sat Mar  7 11:27:47 2020
+-----------------------------------------------------------------------------+
| NVIDIA-SMI 440.33.01    Driver Version: 440.33.01    CUDA Version: 10.2     |
|-------------------------------+----------------------+----------------------+
| GPU  Name        Persistence-M| Bus-Id        Disp.A | Volatile Uncorr. ECC |
| Fan  Temp  Perf  Pwr:Usage/Cap|         Memory-Usage | GPU-Util  Compute M. |
|===============================+======================+======================|
|   0  Tesla T4            On   | 00000000:00:08.0 Off |                    0 |
| N/A   25C    P8     9W /  70W |      0MiB / 15109MiB |      0%      Default |
+-------------------------------+----------------------+----------------------+

+-----------------------------------------------------------------------------+
| Processes:                                                       GPU Memory |
|  GPU       PID   Type   Process name                             Usage      |
|=============================================================================|
|  No running processes found                                                 |
+-----------------------------------------------------------------------------+
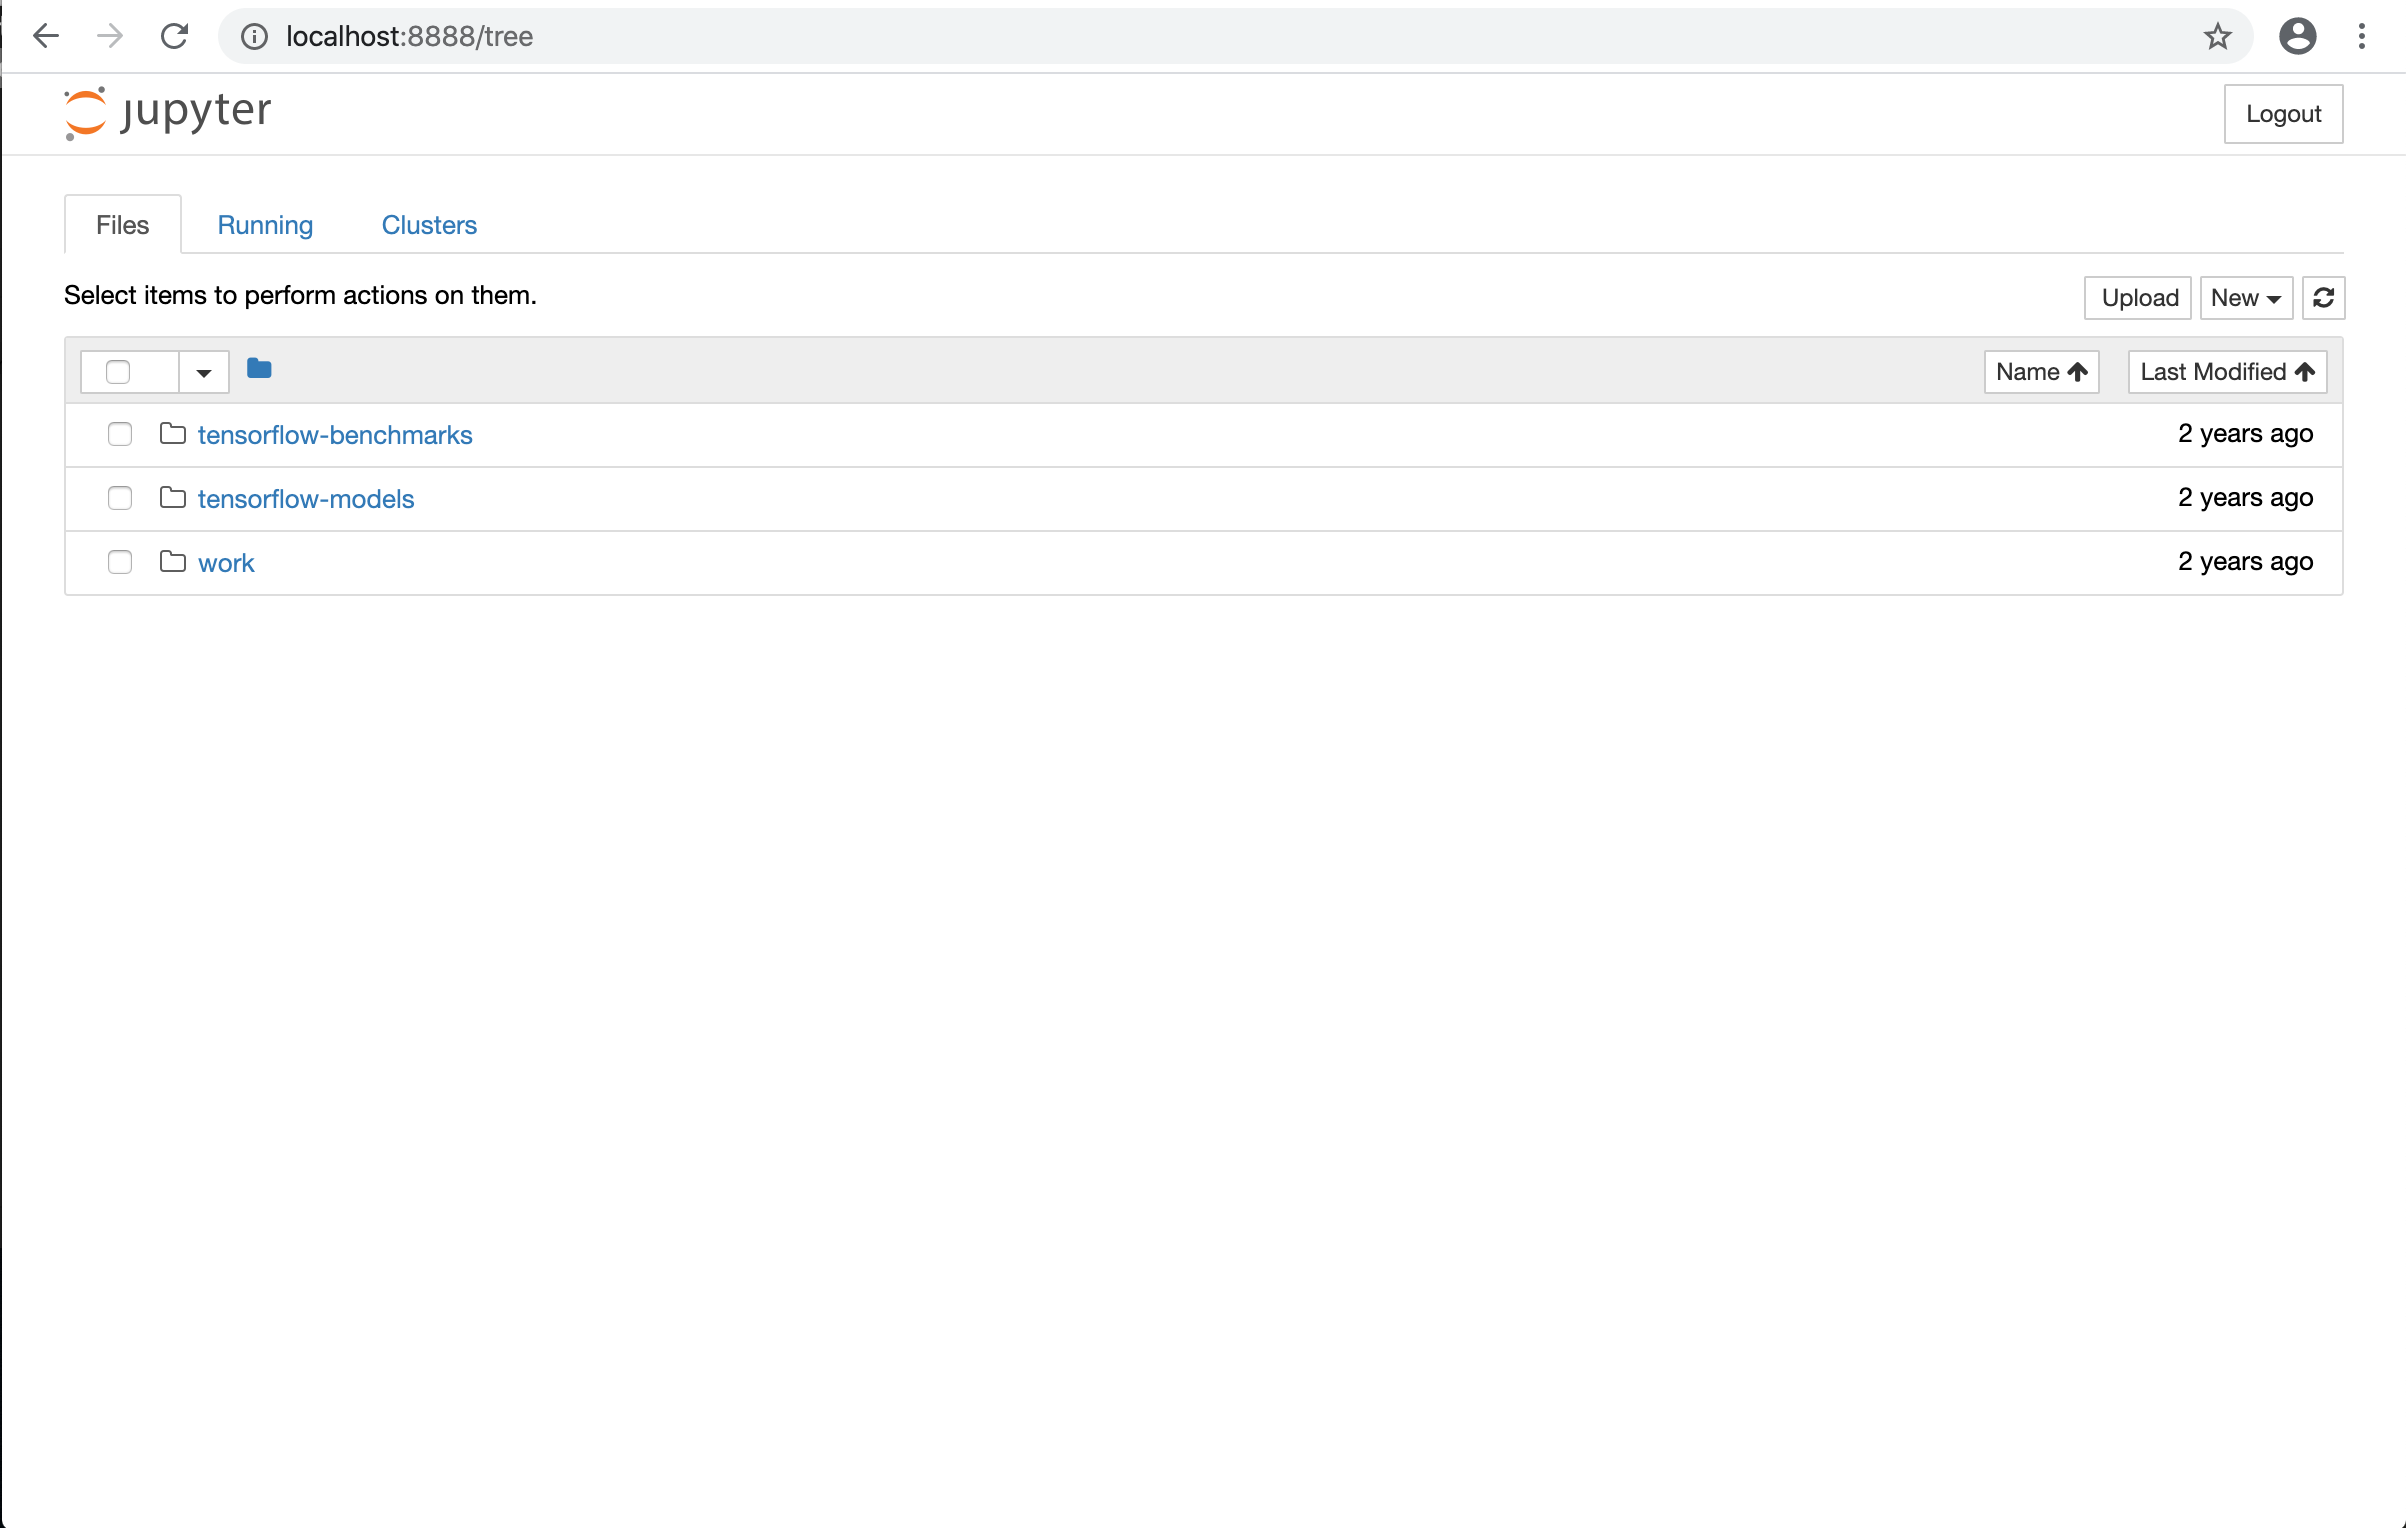
Test Jupyter Notebook with TensorFlow
Create a Notebook:
[egallen@datastation ~]$ oc apply -f https://nvidia.github.io/gpu-operator/notebook-example.yml
service/tf-notebook created
pod/tf-notebook created
Check the tf-notebook status:
[egallen@datastation ~]$ oc get pods tf-notebook
NAME          READY   STATUS    RESTARTS   AGE
tf-notebook   1/1     Running   0          2m35s
Check the tf-notebook logs:
[egallen@datastation ~]$ oc logs tf-notebook
Execute the command
[I 11:31:27.198 NotebookApp] Writing notebook server cookie secret to /home/jovyan/.local/share/jupyter/runtime/notebook_cookie_secret
[W 11:31:27.706 NotebookApp] WARNING: The notebook server is listening on all IP addresses and not using encryption. This is not recommended.
[I 11:31:27.926 NotebookApp] import tensorboard error, check tensorflow install
[I 11:31:27.926 NotebookApp] jupyter_tensorboard extension loaded.
[I 11:31:27.950 NotebookApp] JupyterLab alpha preview extension loaded from /opt/conda/lib/python3.6/site-packages/jupyterlab
JupyterLab v0.24.1
Known labextensions:
[I 11:31:27.953 NotebookApp] Running the core application with no additional extensions or settings
[I 11:31:27.956 NotebookApp] Serving notebooks from local directory: /home/jovyan
[I 11:31:27.956 NotebookApp] 0 active kernels
[I 11:31:27.956 NotebookApp] The Jupyter Notebook is running at: http://[all ip addresses on your system]:8888/?token=67505d5221aaa1f5a999d7befbf7b8caf55d9669c7a3769e
[I 11:31:27.956 NotebookApp] Use Control-C to stop this server and shut down all kernels (twice to skip confirmation).
[C 11:31:27.956 NotebookApp]

    Copy/paste this URL into your browser when you connect for the first time,
    to login with a token:
        http://localhost:8888/?token=67505d5221aaa1f5a999d7befbf7b8caf55d9669c7a3769e
Enable the port forwarding:
[egallen@datastation ~]$ oc port-forward tf-notebook 8888:8888
Forwarding from 127.0.0.1:8888 -> 8888
Forwarding from [::1]:8888 -> 8888
Create a tunnel from a laptop if you want a remote access to your Data Science Desktop:
egallen@laptop ~ % ssh -N -L 8888:localhost:8888 datastation
Tou can delete the pod:
[egallen@datastation ~]$ oc delete pods tf-notebook
pod "tf-notebook" deleted
Test Resnet50 benchmark
Switch to the gpu-operator-resources namespace:
[egallen@datastation ~]$ oc project gpu-operator-resources
Define your TensorFlow pod manifest:
[egallen@datastation ~]$ cat tensorflow-resnet50.yaml
apiVersion: v1
kind: Pod
metadata:
  name: resnet50
  namespace: gpu-operator-resources
spec:
  tolerations:
    - key: nvidia.com/gpu
      operator: Exists
      effect: NoSchedule
  serviceAccount: nvidia-device-plugin
  serviceAccountName: nvidia-device-plugin
  readOnlyRootFilesystem: true
  restartPolicy: OnFailure
  containers:
  - name: tensorflow-resnet50
    image: nvcr.io/nvidia/tensorflow:20.02-tf1-py3
    env:
      - name: NVIDIA_VISIBLE_DEVICES
        value: all
      - name: NVIDIA_DRIVER_CAPABILITIES
        value: "compute,utility"
      - name: NVIDIA_REQUIRE_CUDA
        value: "cuda>=5.0"
    securityContext:
      allowPrivilegeEscalation: false
      capabilities:
        drop: ["ALL"]
    command: [ "/bin/sh" ]
    args: [ "-c", "python nvidia-examples/cnn/resnet.py --layers=50 --precision=fp16"]
    resources:
      limits:
        nvidia.com/gpu: 1 # requesting 1 GPU
Create your pod:
[egallen@datastation ~]$ oc create -f tflow-resnet50.yaml
pod/resnet50 created
Check the TensorFlow logs:
[egallen@datastation ~]$ oc logs resnet50 | egrep -A10 'Training|Created TensorFlow'
2020-03-07 15:42:55.649133: I tensorflow/core/common_runtime/gpu/gpu_device.cc:1325] Created TensorFlow device (/job:localhost/replica:0/task:0/device:GPU:0 with 10576 MB memory) -> physical GPU (device: 0, name: Tesla T4, pci bus id: 0000:00:08.0, compute capability: 7.5)
2020-03-07 15:42:57.678044: I tensorflow/compiler/jit/xla_compilation_cache.cc:238] Compiled cluster using XLA!  This line is logged at most once for the lifetime of the process.
2020-03-07 15:42:59.077018: W tensorflow/compiler/jit/mark_for_compilation_pass.cc:1648] (One-time warning): Not using XLA:CPU for cluster because envvar TF_XLA_FLAGS=--tf_xla_cpu_global_jit was not set.  If you want XLA:CPU, either set that envvar, or use experimental_jit_scope to enable XLA:CPU.  To confirm that XLA is active, pass --vmodule=xla_compilation_cache=1 (as a proper command-line flag, not via TF_XLA_FLAGS) or set the envvar XLA_FLAGS=--xla_hlo_profile.
2020-03-07 15:43:04.389640: W tensorflow/core/framework/cpu_allocator_impl.cc:81] Allocation of 38535168 exceeds 10% of system memory.
WARNING:tensorflow:From /workspace/nvidia-examples/cnn/nvutils/runner.py:67: The name tf.train.SessionRunArgs is deprecated. Please use tf.estimator.SessionRunArgs instead.

2020-03-07 15:43:06.722809: I tensorflow/core/grappler/optimizers/generic_layout_optimizer.cc:345] Cancel Transpose nodes around Pad: transpose_before=transpose pad=fp32_vars/Pad transpose_after=fp32_vars/conv2d/Conv2D-0-TransposeNCHWToNHWC-LayoutOptimizer,gradients/fp32_vars/conv2d/Conv2D_grad/Conv2DBackpropFilter-0-TransposeNCHWToNHWC-LayoutOptimizer
2020-03-07 15:43:09.283047: I tensorflow/stream_executor/platform/default/dso_loader.cc:44] Successfully opened dynamic library libcudnn.so.7
2020-03-07 15:43:12.063704: I tensorflow/stream_executor/platform/default/dso_loader.cc:44] Successfully opened dynamic library libcublas.so.10
2020-03-07 15:43:35.542158: I tensorflow/core/grappler/optimizers/generic_layout_optimizer.cc:345] Cancel Transpose nodes around Pad: transpose_before=transpose pad=fp32_vars/Pad transpose_after=fp32_vars/conv2d/Conv2D-0-TransposeNCHWToNHWC-LayoutOptimizer,gradients/fp32_vars/conv2d/Conv2D_grad/Conv2DBackpropFilter-0-TransposeNCHWToNHWC-LayoutOptimizer
PY 3.6.9 (default, Nov  7 2019, 10:44:02)
--
Training
  Step Epoch Img/sec   Loss  LR
     1   1.0     9.0  7.652  8.623 2.00000
    10  10.0    33.1  4.117  5.089 1.62000
    20  20.0   324.9  0.134  1.110 1.24469
    30  30.0    46.2  0.062  1.043 0.91877
    40  40.0   337.0  0.047  1.028 0.64222
    50  50.0    14.0  0.105  1.088 0.41506
    60  60.0    74.6  0.105  1.089 0.23728
    70  70.0   433.6  0.003  0.989 0.10889
    80  80.0   433.5  0.080  1.065 0.02988
Pod with status “Completed”:
[egallen@datastation ~]$ oc get pods resnet50
NAME       READY   STATUS      RESTARTS   AGE
resnet50   0/1     Completed   0          15m
Test GPU training benchmark
Create the GPU benchmark Pod Definition YAML file:
[egallen@datastation crc-linux-1.6.0-amd64]$ oc project gpu-operator-resources
Already on project "gpu-operator-resources" on server "https://api.crc.testing:6443".

[egallen@datastation ~]$ cat << EOF > tensorflow-benchmarks-gpu.yaml
apiVersion: v1
kind: Pod
metadata:
 name: tensorflow-benchmarks-gpu
spec:
 containers:
 - image: nvcr.io/nvidia/tensorflow:19.09-py3
   name: cudnn
   command: ["/bin/sh","-c"]
   args: ["git clone https://github.com/tensorflow/benchmarks.git;cd benchmarks/scripts/tf_cnn_benchmarks;python3 tf_cnn_benchmarks.py --num_gpus=1 --data_format=NHWC --batch_size=32 --model=resnet50 --variable_update=parameter_server"]
   resources:
    limits:
      nvidia.com/gpu: 1
    requests:
      nvidia.com/gpu: 1
 restartPolicy: Never
EOF
Create the GPU benchmark pod:
[egallen@datastation ~]$ oc create -f tensorflow-benchmarks-gpu.yaml
pod/tensorflow-benchmarks-gpu created
The pod is running:
[egallen@datastation crc-linux-1.6.0-amd64]$ oc get pods tensorflow-benchmarks-gpu
NAME                        READY   STATUS    RESTARTS   AGE
tensorflow-benchmarks-gpu   1/1     Running   0          23s
Status completed:
[egallen@datastation crc-linux-1.6.0-amd64]$ oc get pods tensorflow-benchmarks-gpu
NAME                        READY   STATUS      RESTARTS   AGE
tensorflow-benchmarks-gpu   0/1     Completed   0          9m42s
Check the results:
[egallen@datastation crc-linux-1.6.0-amd64]$  oc logs tensorflow-benchmarks-gpu | tail -34
TensorFlow:  1.14
Model:       resnet50
Dataset:     imagenet (synthetic)
Mode:        training
SingleSess:  False
Batch size:  32 global
             32 per device
Num batches: 100
Num epochs:  0.00
Devices:     ['/gpu:0']
NUMA bind:   False
Data format: NHWC
Optimizer:   sgd
Variables:   parameter_server
==========
Generating training model
Initializing graph
Running warm up
Done warm up
Step  Img/sec total_loss
1 images/sec: 123.8 +/- 0.0 (jitter = 0.0)  8.108
10  images/sec: 124.7 +/- 0.4 (jitter = 0.6)  8.122
20  images/sec: 124.7 +/- 0.3 (jitter = 1.1)  7.983
30  images/sec: 124.8 +/- 0.2 (jitter = 1.0)  7.780
40  images/sec: 124.7 +/- 0.2 (jitter = 1.1)  7.848
50  images/sec: 124.2 +/- 0.4 (jitter = 1.3)  7.779
60  images/sec: 124.2 +/- 0.3 (jitter = 1.5)  7.825
70  images/sec: 124.2 +/- 0.3 (jitter = 1.5)  7.840
80  images/sec: 124.1 +/- 0.3 (jitter = 1.5)  7.818
90  images/sec: 124.1 +/- 0.2 (jitter = 1.3)  7.646
100 images/sec: 124.1 +/- 0.2 (jitter = 1.2)  7.916
----------------------------------------------------------------
total images/sec: 123.98
----------------------------------------------------------------
APPENDIX
Uninstall the GPU Operator
If you want to uninstall the gpu-operator:
[egallen@datastation ~]$ oc project default

[egallen@datastation ~]$ ./helm list --all --all-namespaces
NAME                    NAMESPACE REVISION  UPDATED                                 STATUS    CHART               APP VERSION
gpu-operator-1583580048 default   1         2020-03-07 12:20:49.320119471 +0100 CET deployed  gpu-operator-1.0.0  1.0.0

[egallen@datastation ~]$ ./helm delete gpu-operator-1583580048 -n default
release "gpu-operator-1583580048" uninstalled
Remove UBI Entitlement
List the machine configs:
[egallen@datastation ~]$ oc get mc
NAME                                                        GENERATEDBYCONTROLLER                      IGNITIONVERSION   CREATED
00-master                                                   25bb6aeb58135c38a667e849edf5244871be4992   2.2.0             22d
00-worker                                                   25bb6aeb58135c38a667e849edf5244871be4992   2.2.0             22d
01-master-container-runtime                                 25bb6aeb58135c38a667e849edf5244871be4992   2.2.0             22d
01-master-kubelet                                           25bb6aeb58135c38a667e849edf5244871be4992   2.2.0             22d
01-worker-container-runtime                                 25bb6aeb58135c38a667e849edf5244871be4992   2.2.0             22d
01-worker-kubelet                                           25bb6aeb58135c38a667e849edf5244871be4992   2.2.0             22d
50-entitlement-key-pem                                                                                 2.2.0             15h
50-entitlement-pem                                                                                     2.2.0             15h
50-rhsm-conf                                                                                           2.2.0             15h
99-master-e066c785-bb70-42fc-b758-5a414c7bcd8e-registries   25bb6aeb58135c38a667e849edf5244871be4992   2.2.0             22d
99-master-ssh                                                                                          2.2.0             22d
99-worker-f850b088-938e-4b3d-814a-adab854ba100-registries   25bb6aeb58135c38a667e849edf5244871be4992   2.2.0             22d
99-worker-ssh                                                                                          2.2.0             22d
rendered-master-03acbbe4bf880b01593c74b01927cf53            25bb6aeb58135c38a667e849edf5244871be4992   2.2.0             22d
rendered-worker-e7d5c5648a26693356c167109e479099            25bb6aeb58135c38a667e849edf5244871be4992   2.2.0             22d
Delete the machine configs:
[egallen@datastation ~]$ oc delete -f 0003-cluster-wide-machineconfigs.yaml
machineconfig.machineconfiguration.openshift.io "50-rhsm-conf" deleted
machineconfig.machineconfiguration.openshift.io "50-entitlement-pem" deleted
machineconfig.machineconfiguration.openshift.io "50-entitlement-key-pem" deleted
Check after the delete:
[egallen@datastation ~]$ oc get mc
NAME                                                        GENERATEDBYCONTROLLER                      IGNITIONVERSION   CREATED
00-master                                                   25bb6aeb58135c38a667e849edf5244871be4992   2.2.0             22d
00-worker                                                   25bb6aeb58135c38a667e849edf5244871be4992   2.2.0             22d
01-master-container-runtime                                 25bb6aeb58135c38a667e849edf5244871be4992   2.2.0             22d
01-master-kubelet                                           25bb6aeb58135c38a667e849edf5244871be4992   2.2.0             22d
01-worker-container-runtime                                 25bb6aeb58135c38a667e849edf5244871be4992   2.2.0             22d
01-worker-kubelet                                           25bb6aeb58135c38a667e849edf5244871be4992   2.2.0             22d
99-master-e066c785-bb70-42fc-b758-5a414c7bcd8e-registries   25bb6aeb58135c38a667e849edf5244871be4992   2.2.0             22d
99-master-ssh                                                                                          2.2.0             22d
99-worker-f850b088-938e-4b3d-814a-adab854ba100-registries   25bb6aeb58135c38a667e849edf5244871be4992   2.2.0             22d
99-worker-ssh                                                                                          2.2.0             22d
rendered-master-03acbbe4bf880b01593c74b01927cf53            25bb6aeb58135c38a667e849edf5244871be4992   2.2.0             22d
rendered-worker-e7d5c5648a26693356c167109e479099            25bb6aeb58135c38a667e849edf5244871be4992   2.2.0             22d